


I founded my own framing and siding company back in 1990, and while my brother still runs the siding division, much of my work these days comes from consulting on failed exteriors. On most of these jobs, there is one detail –the kickout flashing at roof-wall intersections–that I see done wrong most of the time. In a neighborhood of 30 homes, I expect to find at least 28 with exterior problems, and most of these will have no kickouts. When they do exist, they will be of sub-standard quality.
Some builders do recognize this as a vulnerable spot, and in a good-intentioned but feeble effort, often smear gobs of extra caulk into the siding notch. Others will install a piece of metal flashing (recognizing that a flashing is required by code), but this metal is rarely large enough to deflect roof run-off into the gutter. The resulting damage from the overflow — gallons and gallons of water regularly pouring over the wall area below — can be catastrophic. I’ve had jobs we ended up remediating that had earthworms in the wall. The sheathing and framing had rotted all the way to grade level to such an extent that the wall had essentially turned to dirt.
DO IT RIGHT THE FIRST TIME
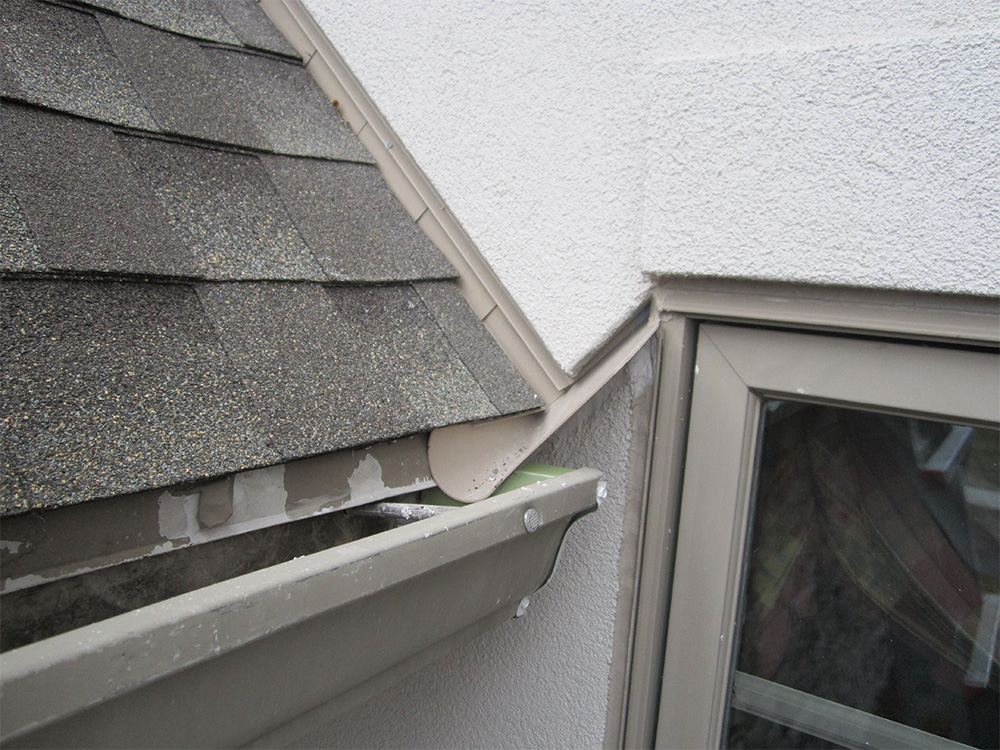
The photo above shows a correctly detailed kick out on an EIRS stucco exterior. This kickout is particularly important because it terminates directly at a window opening — a fairly common occurrence, but one that can be especially devastating: If the kickout is wrong, chances are high that the window flashing is worse, and there is little hope of keeping water out of the wall. Water can quickly find its way to interior finishes, leading to extensive mold — problems that carry enormous liability and a higher price tag. It would be so much easier and less expensive to invest in $15 worth of flashing, to begin with.
The details are essentially the same for all cladding types. The process starts with a large, one-piece kickout flashing with a return that is big enough to prevent run-off from overflowing the top. We typically use ones made by DryFlekt (dryflekt.com). Unlike with a site-made metal kickout, you don’t need to worry about making bends, and the flashing won’t corrode. The ones from DryFlekt are made of a thermoplastic polyolefin, or TPO, which is pretty good at resisting UV degradation and stands up well to a wide range of temperatures, so it’s unlikely to become brittle and crack. We have put in hundreds of these over the last decade and have never had a problem.
-
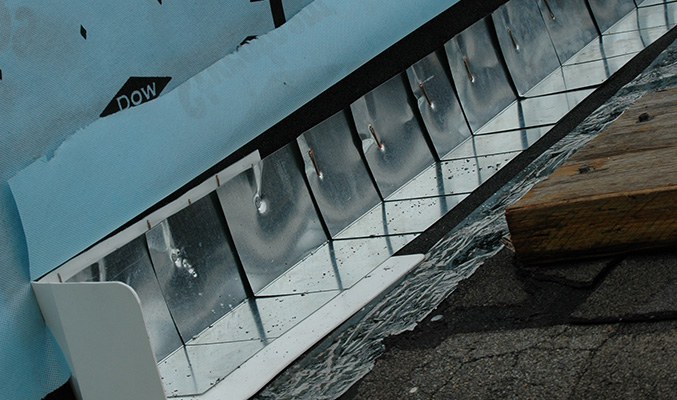
- A pre-made, one-piece TPO kickout, like this one from DryFlekt, is large enough to deflect roof runoff into the (yet-to-be-installed) gutter.
-
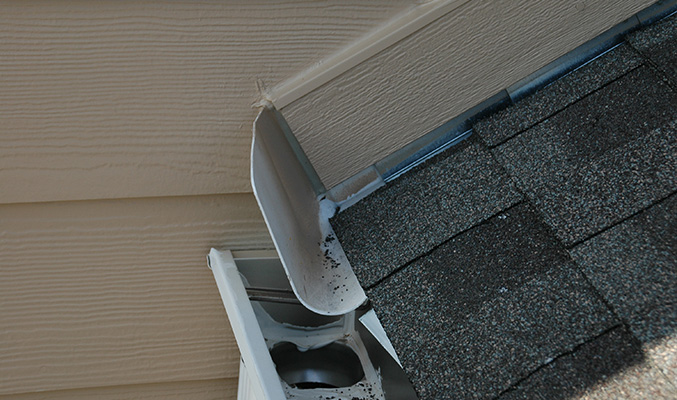
- With horizontal siding, the author installs a trim board along the rake, keeping it a minimum of 1 inch above the roofing.
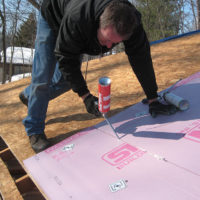
We usually begin by installing a piece of peel-and-stick flashing, folding it into the corner between the roof and the wall. The kickout goes in next, followed by standard step flashings. The job shown at top left is typical for a reroof, where we cut in and begin detailing the intersections first. The roofer, of course, will come along later and slide new shingles between the steps. And the WRB will be folded down.
We bed the edge of the WRB in a thick bead of sealant and then bring the siding down, keeping it at least 1 inch above the finish roofing. For stucco, stone or masonry veneer, we terminate the cladding with a weep screed held off the roof 1 inch. For horizontal siding, we typically install a trim board along the rake, which will simplify future reroofs (see photo, bottom left). This board has a simple aluminum Z-flashing along the top edge to protect the exposed edge of the trim board and can be applied directly over the WRB because any water that gets behind the WRB will drain out onto the step flashing.
Continue Reading:

Why I am NOT a Home Inspector
Call Before It's an Emergency
© Copyright 2026, The Building Consultant/Mark Parlee
Des Moines Web Design  by Flying Hippo