


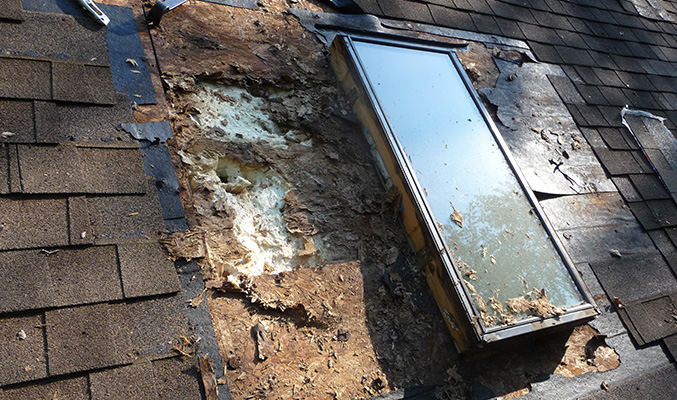
 Water dripping from a skylight during an autumn rainstorm looked like a minor leak. But when the roofer making repairs discovered an unexpectedly large area of saturated OSB sheathing and extremely corroded nails and plywood clips, he called me to take a look. We agreed that this was more than a flashing problem.
The roofer and I had worked on the house together 13 years earlier, when it was built. I was the framing contractor; the owners were the GCs. Vaulted ceilings were a key part of the home’s design, and I’d framed much of the 6/12-pitch roof with raised-heel scissor trusses. The owners then had the trusses insulated with open-cell Icynene spray foam, creating an unventilated roof assembly. Icynene was also used to insulate the walls of the single-story home, which was built on a permanent wood foundation surrounded by berms on the west, north, and east sides.
Inside, the soil was covered with compacted stone and a layer of poly taped at the seams; the pressure-treated floor joists were installed on top. The home is heated with a natural gas furnace and has central air conditioning and a Venmar vanEE 1000 Duo energy-recovery ventilator (ERV). Supply ductwork in the attic was also insulated with Icynene, while uninsulated return ductwork runs underneath the wood-frame floor.
Foam Inspection
-
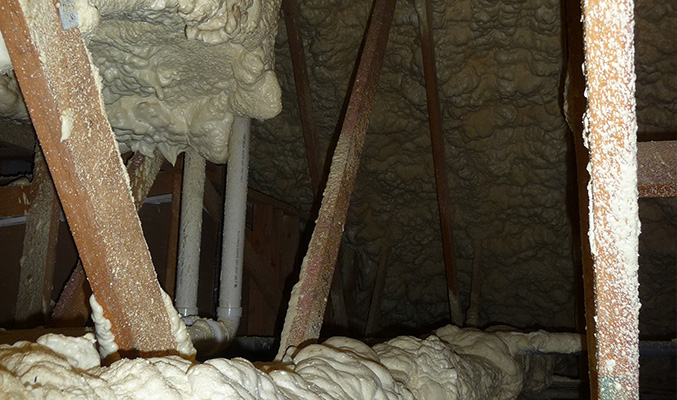
- Framed with a combination of standard and raisedheel scissors trusses, the conditioned attic was insulated with low-density open-cell foam sprayed on the underside of the roof sheathing.
-
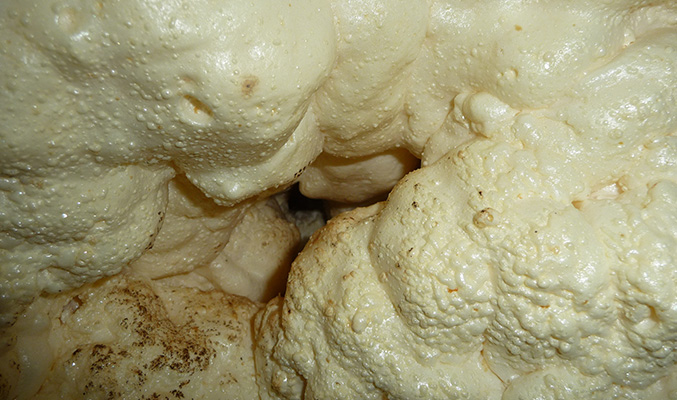
- The foam installation had some voids that could have allowed warm, moist air to reach the underside of the cold roof sheathing and condense
-
- The void shown here corresponded with an area of rotted sheathing near the skylight.
I wondered if the home’s unusual construction and unvented roof were contributing to the problem, so I called Silas Hoeppner of Cenergy, a local HERS rater and energy consultant, to inspect the foam installation. Hoeppner didn’t discover any major defects, but he did find several small voids, some of which corresponded with areas of damaged sheathing that we found (see images 1-3 above). Those voids could have allowed some moisture to be transported by air movement to the sheathing.
Vapor diffusion — the movement of moisture from areas with high moisture concentrations to areas with lower moisture concentrations — was also a concern. Icynene is a good air barrier, but unlike closed-cell spray foam, it’s vapor permeable. The IRC requires a vapor retarder coating to slow diffusion when an unvented roof is insulated with open-cell foam in climate zone 5, where this house is located. While this installation had no vapor retarder — and therefore did not meet code — Hoeppner noted that the manufacturer’s specs don’t recommend one in Des Moines’ 6,600 heating-degree-day climate, since it could interfere with drying to the interior during warm months, when the air conditioning is operating and the interior the house is cooler and drier than the exterior.
Most of the roof deck was sprayed with 9 inches of Icynene, which has a stated R-value of 3.6 per inch. But the insulation was sprayed unevenly, and Hoeppner measured depths as little as 6 inches (R-21.6). Even assuming an average R-value of around 30, the roof had less insulation than the IRC’s current R-38 minimum for zone 5.
Measuring Humidity and Radon
-
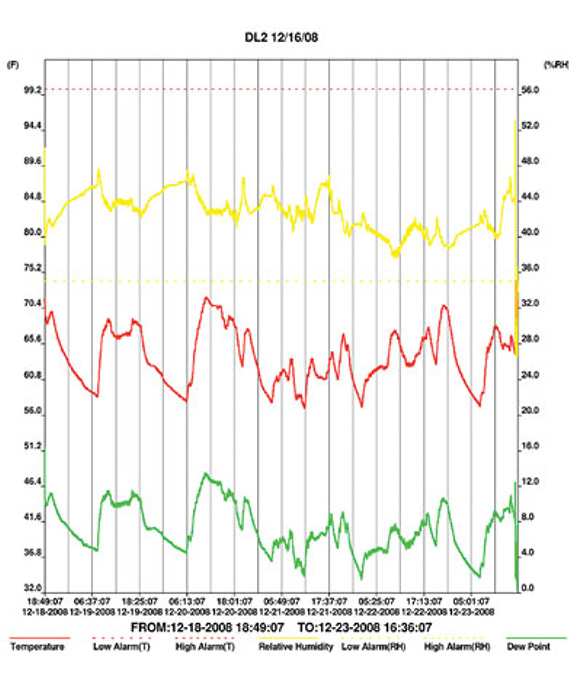
- Temperature and humidity data showed abnormally high wintertime relative-humidity levels — almost 50 percent in the home’s conditioned attic and even higher in the living space.
To monitor the home’s temperature and humidity levels, I installed a couple of simple UEi THL1 data loggers (877/571-7901, tequipment.net). I mounted one high up on one of the vaulted ceilings in the living space, and another in an attic area. Using software that came with the data loggers, I charted the data over a period of two winter weeks in December 2009 (see graph above) and found that the home had relative humidity (RH) levels that ranged from 40 to 48 percent in the conditioned attic but rose as high as 56 percent in the living space, even with the ERV operating.
Given the home’s unusual earth-bermed construction and the high radon levels in our area, radon testing also seemed like a good idea. As it turned out, the home had levels exceeding 38 picocuries per liter (pCi/L), much higher than the EPA’s 4 pCi/L action level. So my clients installed a radon mitigation system — basically a continuous duty fan that depressurizes the subsoil under the ground-level vapor barrier and exhausts radon-containing soil gas to the outside. With the new radon system installed, radon levels dropped below 3 pCi/L later that winter. As an added benefit, the installer reported that RH levels in the house had dropped beneath 30 percent, a more normal wintertime level.
Depressurizing the soil under a house also tends to dry the soil out, so I wasn’t surprised by the drop in indoor humidity. I was concerned that the roof damage had been caused by excess water vapor from the soil migrating through the spray foam — either through diffusion or, more likely, air leakage — and condensing on the cold sheathing. But I couldn’t rule out the possibility that the wet sheathing was the result of ice dams caused by conductive heat loss, especially considering the modest levels of insulation and the roof’s relatively low pitch.
Roof Repair
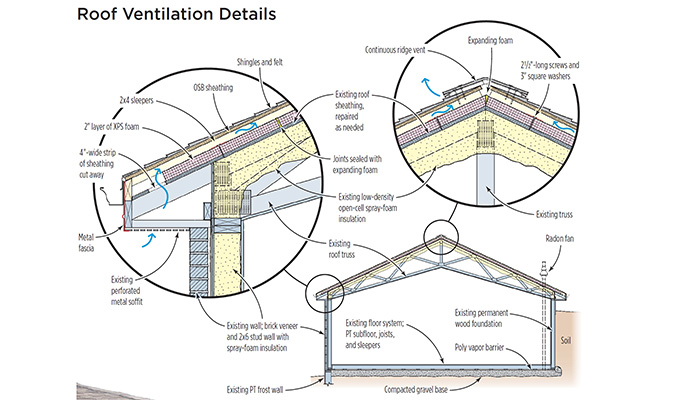
With indoor humidity now in check, I was less concerned about vapor migrating through the Icynene and condensing on the roof sheathing. Still, there wasn’t enough insulation in the roof, so I recommended stripping the entire roof and adding a continuous layer of 2-inch-thick extruded polystyrene (XPS) on top of the roof deck, then installing 2×4 sleepers, new sheathing, and new shingles. The new foam and sheathing would more than triple the cost of reroofing the house, but it was the least expensive way to add needed insulation to the vaulted ceilings. Owens Corning Foamular 250 has an R-value of 5 per inch, so 2 inches of foam would bring the R-value of the roof assembly up to about R-40. The continuous layer of foam would also keep the OSB sheathing warmer, so that it would be less likely to become a condensing surface. Since we would have to install sleepers over the foam to attach new sheathing, I planned to take advantage of this by also using the sleepers to provide ventilation to the new roof deck. This would help keep that sheathing cold and prevent the formation of ice dams. Of course, adding extra thickness to the roof meant that we would also have to address the existing fascia and gutters and remount the skylights.
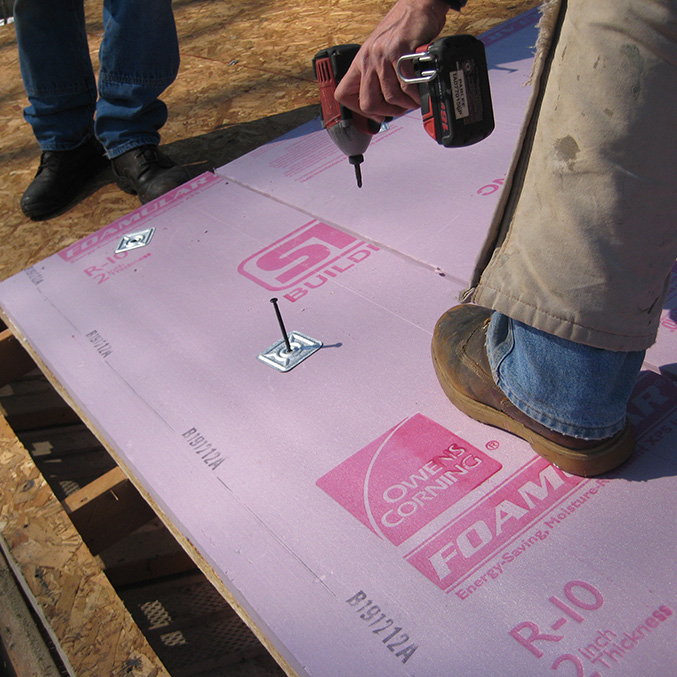
Installing the Foam
-

- While the initial problem appeared to be a leaking skylight, there were other areas on the roof that had deteriorating OSB sheathing and corroding plywood clips and fasteners.
-
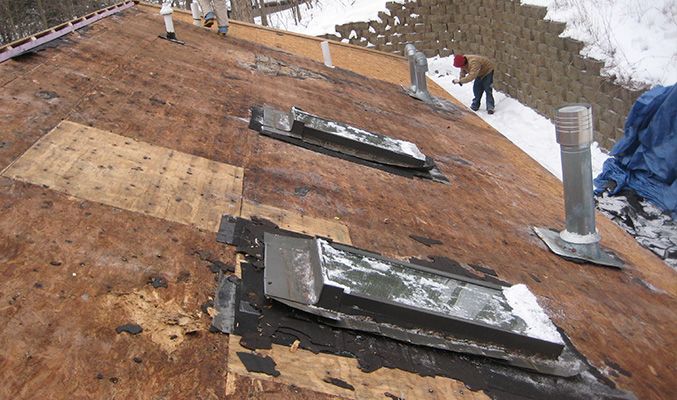
- The north-facing roof sheathing over the vaulted living space suffered the most damage, while the sheathing over the unconditioned garage attic (at the far end of the roof in the photo above) showed virtually no damage at all.
-
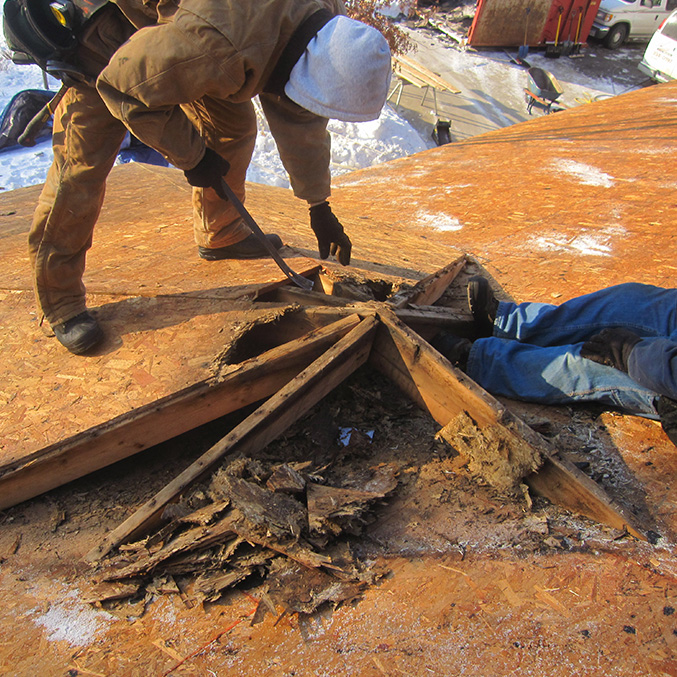
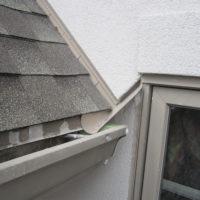
- Warm, humid air had collected and condensed on the framing and sheathing of the bump-out entryway roof, causing it to rot.
-
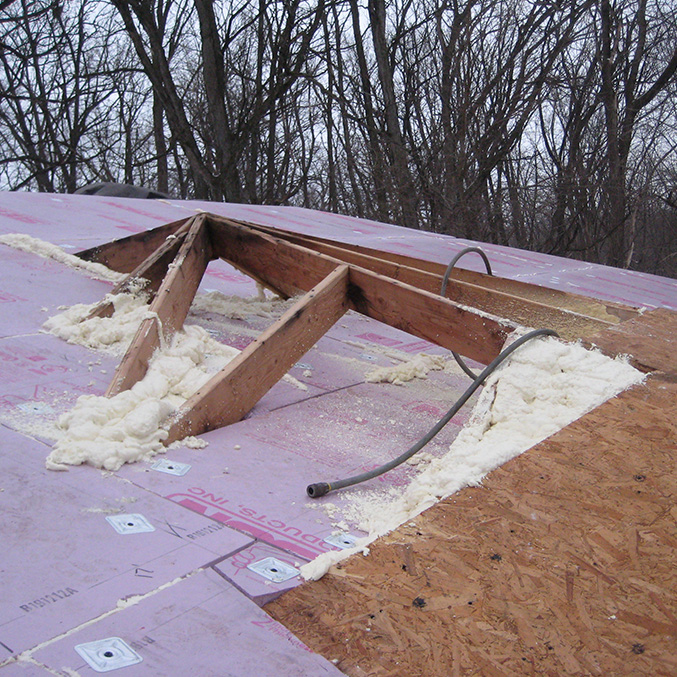
- To block air leakage into this cavity, the author cut rigid foam to fit around the framing and over the partially sheathed roof
-
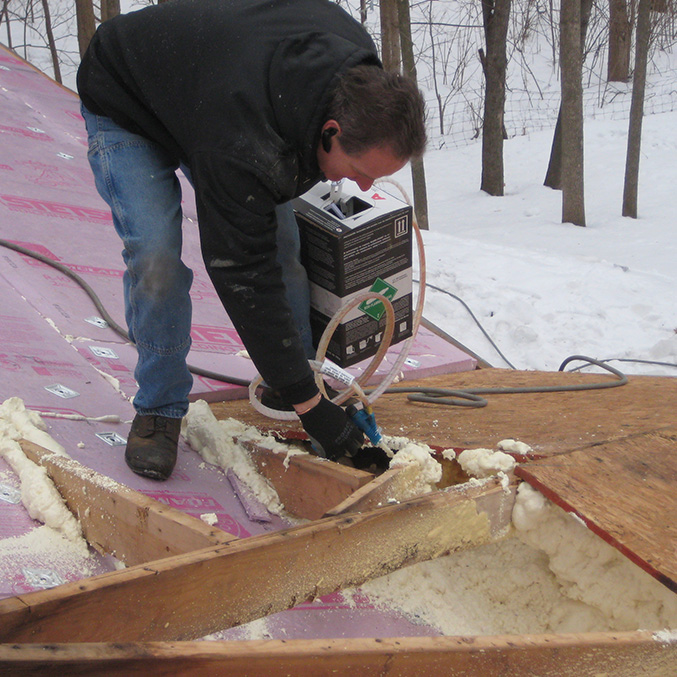
- Then sealed everything up with two-part foam
Once my crew starting stripping off the old roof, we found more areas of damaged sheathing, with the worst damage on the north-facing side of the roof where the skylights were located. Interestingly, the sheathing over the heated garage — which was conventionally insulated with cellulose blown into the attic rather than spray foam on the sheathing — looked as new as the day the shingles were installed (see images 1 & 2 above). It’s possible that humidity levels were lower in the garage attic, since a sheathed and spray-foam-insulated attic partition wall isolated it from the rest of the house.
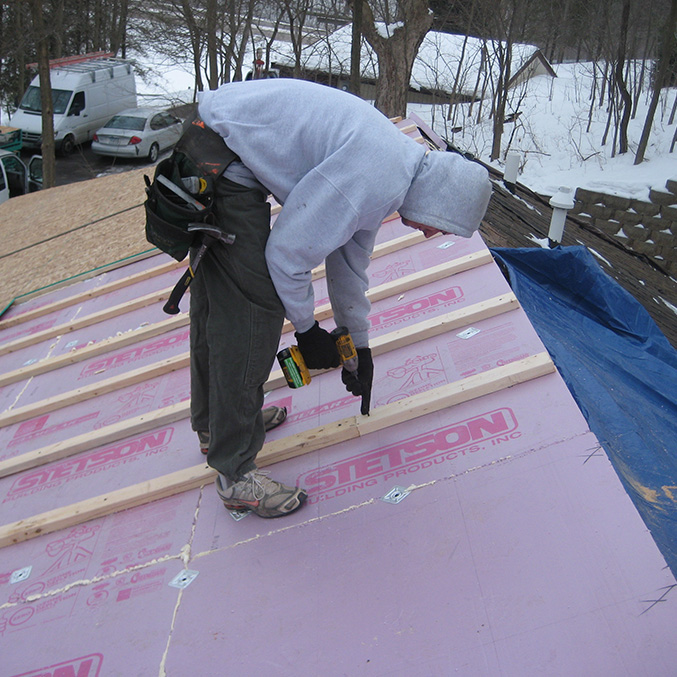
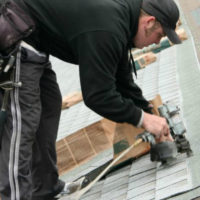
After patching the remaining areas of damaged sheathing, we began installing foam, working from the ridge down. We quickly fastened the rigid sheets to the sheathing with 21/2-inch-long Duro-Last HD screws and washers (800/248-0280, duro-last.com), using four to six fasteners per sheet. Because the sleepers would hold the foam sheets securely in place once they were installed, we needed only enough fasteners to keep the foam from slipping while we walked on it. To ensure that the blanket of rigid foam was as continuous as possible, we carefully sealed all of the joints between the sheets and around penetrations with low-expansion canned spray foam.
The trickiest part of installing the foam board was fitting it around a half-octagon roof framed over a bumpout entry on the south-facing wall of the house. That roof had been framed California-style on top of the existing roof deck, but the lower-level roof sheathing wasn’t continuous (as it typically would be with overlay framing). With the upper framing partially open to the lower framing and perhaps not enough sheathing to spray the foam against, it seemed possible that there was an air pathway up into the upper cavity. This would have allowed water vapor to collect and condense here and could explain why there was considerable rot on the sheathing and framing at the octagon roof peak (see image 3 above). To block off convective pathways into this cavity, we removed the rotted sheathing, cut rigid foam to fit around the repaired framing, then carefully sealed the foam joints with a portable two-part spray foam kit (800/321-5585, fomo.com) before resheathing the roof.
Ventilating the Roof
-
- Taking advantage of existing vented soffits, the author cut slots in the sheathing along the eaves to provide air pathways through the eaves assembly.
-
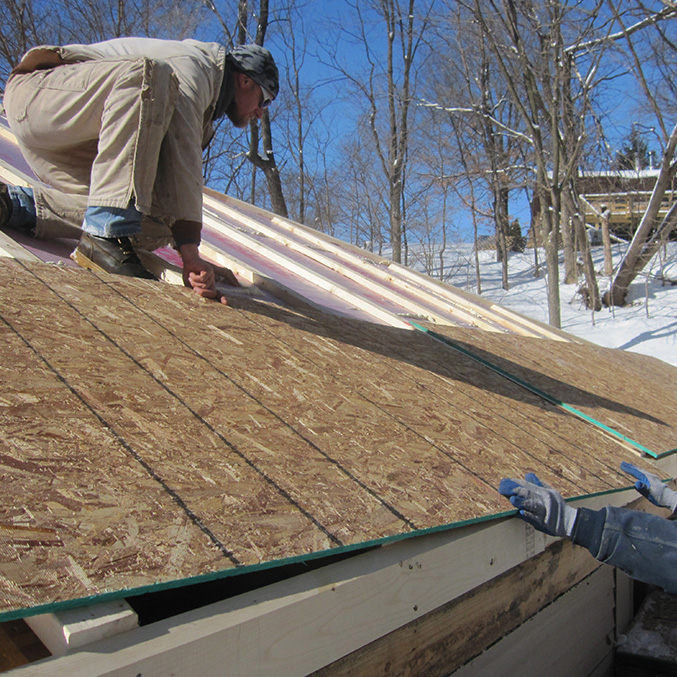
- Sleepers installed over the foam provided solid nailing for the new OSB roof sheathing and ventilation channels underneath.
-
- New beveled 2×6 subfascia “extenders” accommodated the 31/2 inches of added roof thickness.
The original roof trusses had been blocked off at the wall plates with plywood baffles before the Icynene was sprayed, but the eaves themselves were uninsulated and finished with vented metal soffits. By cutting away a 4-inch-wide section of the old roof sheathing along the eaves and outside the wall plate line, we were able to use the original vented soffits to provide an air path up into the 2×4 sleepers installed on top of the rigid foam (see images 1-3 above). The sleepers are fastened through the foam to the trusses underneath with 51/2-inch-long Duro-Last fasteners. We first tried 7-inch screws but found that the shorter screws had plenty of bite and took much less of a toll on the battery life of our cordless impact drivers.
Since condensation didn’t appear to be an issue on the hip roof over the garage, we saved a little money by not installing continuous foam there. Instead, we cut the foam into 31/2-inch-wide strips and padded the sleepers out with these rippings before installing our new sheathing, to avoid visual problems at the eaves and ridge. When we installed the sleepers, we cut them a little short wherever there was an obstruction — at the hips and around skylights, for example — to provide ventilation pathways.
New Roofing
-
- Rigid foam adds R-value to the roof assembly, while a new radon-mitigation system helps dry out the soil beneath the home, reducing indoor humidity levels. Air entering the vented metal soffits (left) flows up through channels between the sleepers and exits out the continuous ridge vent, helping to keep the new roof deck cold.
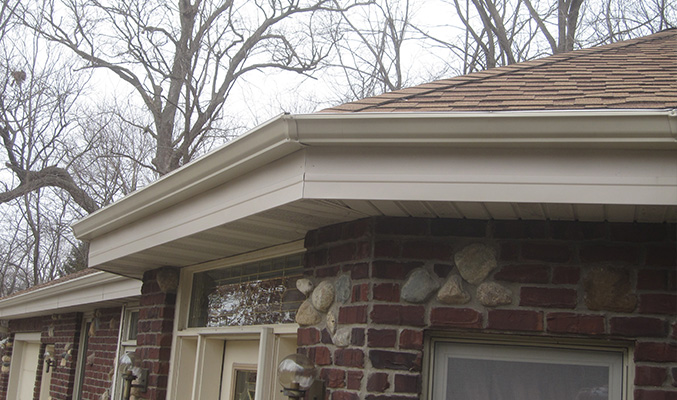
To accommodate the thicker roof assembly at the eaves, we extended the existing subfascia with 2x6s cut with a beveled top edge to match the 6/12 roof pitch. Later, after felting the roof and installing the new architectural shingles, we covered the subfascia with new metal fascia material and installed new gutters to finish the eaves (see image 2 above).
There was no way around it: Installing exterior foam this way also meant remounting the skylights. In this case, the wood skylight frames were so distressed from interior condensation they had to be replaced anyway. At the ridge, we installed a LOR-30 Lo-OmniRoll ridge vent (800/643-5596, lomanco.com), a continuous rollout design that has performed well for us.
In the end, the total cost for repairing this roof was about $32,000, which included the two new Velux skylights. That’s a lot to pay for repairing a roof leak, but with this belt-and-suspenders approach the new roof assembly will be better equipped to handle excess moisture than the original one was.

Why I am NOT a Home Inspector
Call Before It's an Emergency
© Copyright 2026, The Building Consultant/Mark Parlee
Des Moines Web Design  by Flying Hippo