


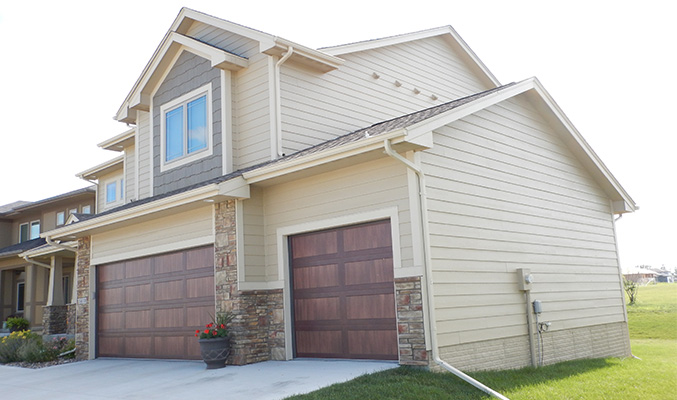
I see a lot of failed siding jobs. The one shown in the photos in this article is typical of the fiber-cement siding jobs I am asked to look at—I could go out right now to hundreds of homes that are in a similar condition. Each one usually looks fine from a distance (1), but when I examine the house up close, I see the same installation errors again and again. For some of the jobs, I am called out to investigate because they have gone to litigation. For others, it’s a homeowner complaint. But almost all of them are very expensive to repair.
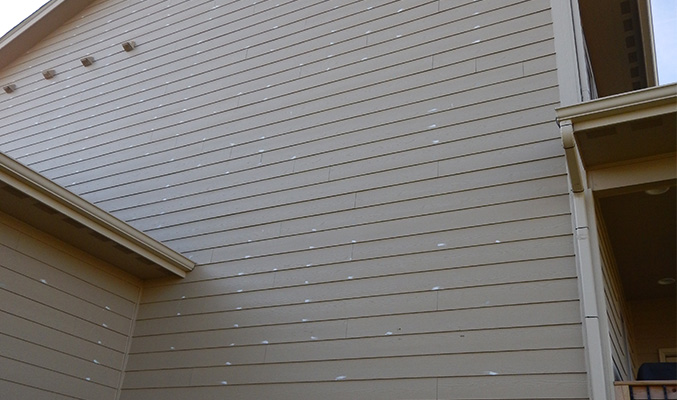
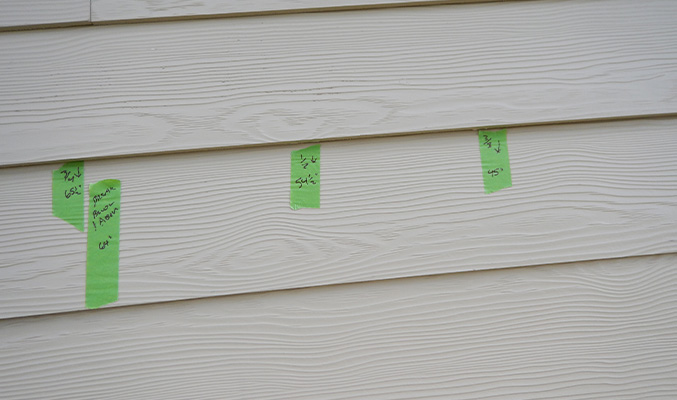
On this house, the siding had been so haphazardly nailed on and the fiber-cement boards so poorly attached that wind caused the siding to vibrate. This vibration transferred through the framing, creating a loud hum when the wind blew that kept the homeowners awake at night. As it turned out, there were problems beyond the inadequate nailing—none of the detailing designed to protect the walls from water had been done correctly. If the siding didn’t fall off first, leaks would eventually wreak havoc on the interior.
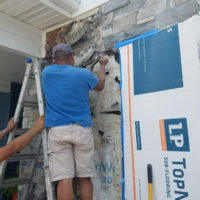
I didn’t think the work could be salvaged, and I recommended tearing off all the siding and starting over. However, because the initial complaint was about the vibration of the loose boards, the builder thought he could fix the job by face-nailing the siding (2). But his “fix,” along with his attempts to correct the water detailing, still didn’t conform to the specifications of the manufacturer’s instructions or those codified in the product’s Evaluation Service Report (ESR).
An ESR is required by the building code as acceptance criteria for any fiber-cement siding product. It’s an easy document to obtain (search online for “ESR” and the product name). It spells out in plain terms the basic installation requirements for the particular product. This document is the code for that specific material, as stated in the “Conditions of Use “ section of every ESR: “The products must be manufactured, identified and installed in accordance with this report, the manufacturer’s published installation instructions and the applicable code. In the event of conflict between the manufacturer’s published installation instructions and this report, this report governs.”
I always download copies of the ESR and the installation instructions and make sure my installers have copies too. The basic requirements for all fiber-cement products are similar, but you can’t assume they are the same. There are small differences in the dimensions that define where nails can be placed and what clearances are needed above adjacent surfaces.
NAILING ISSUES
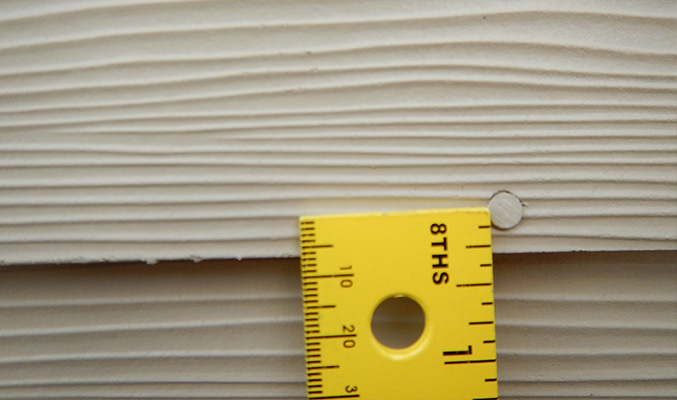
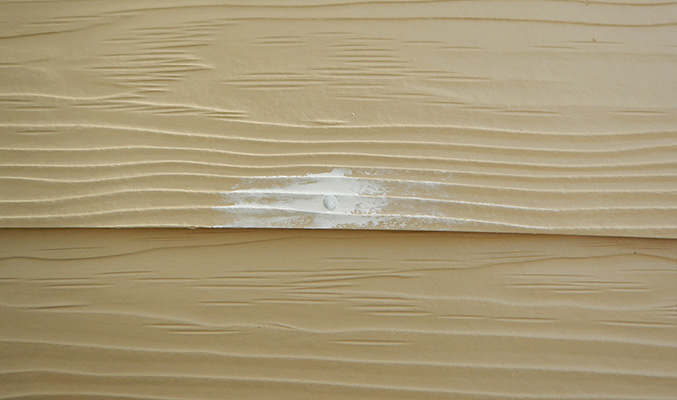
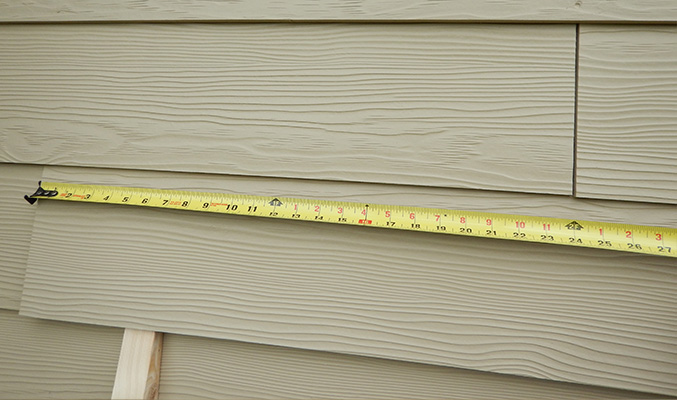
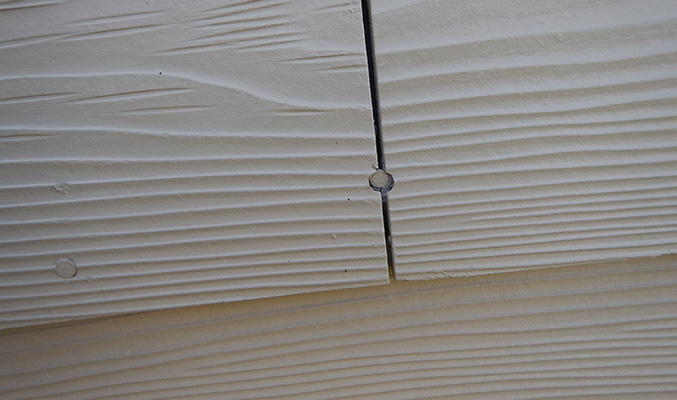

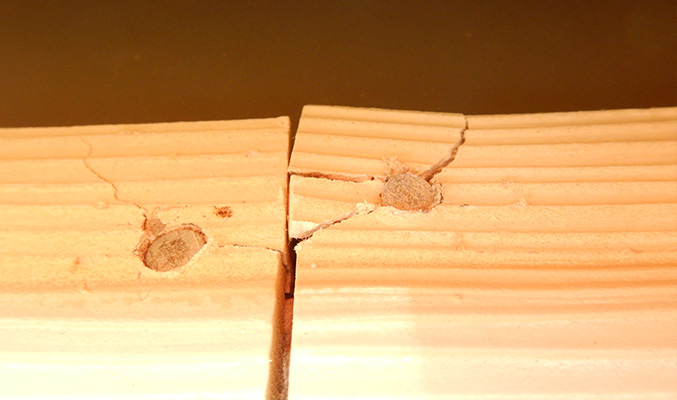
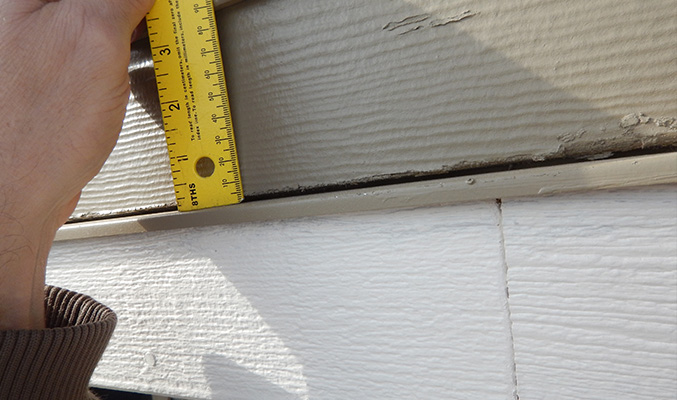
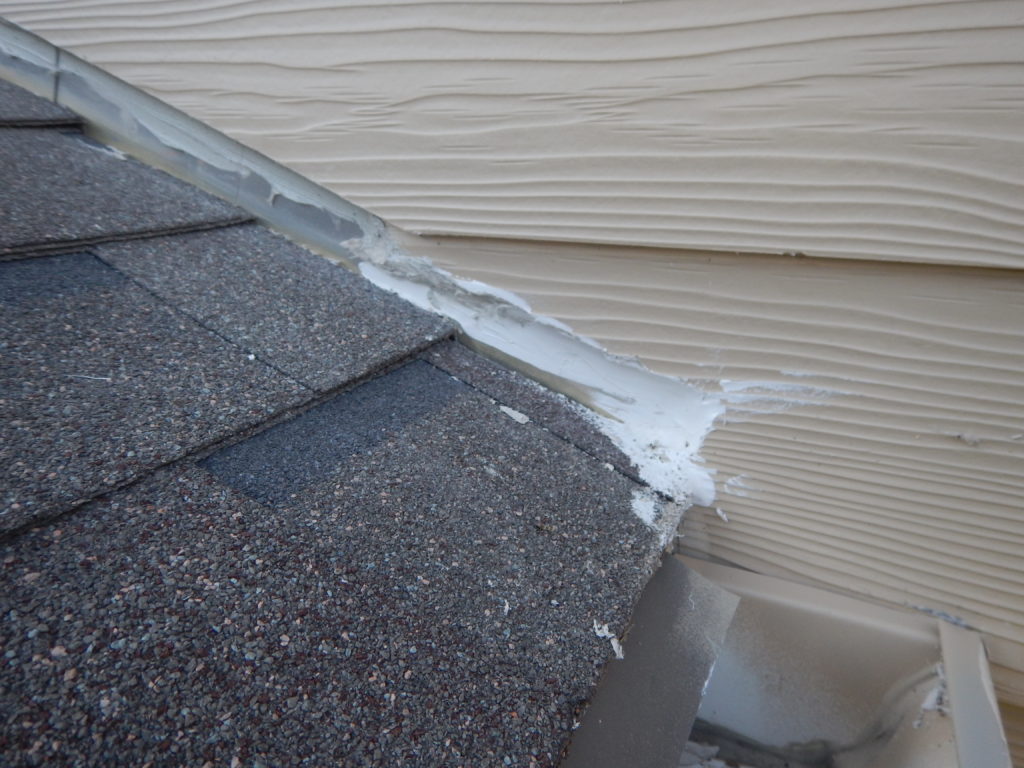
The material used here was MaxTile’s MaxiPlank; and according to its ESR, exposed fasteners (face nails) must be placed at least 3/4 inch up from the bottom edge. Mostly, this job had been blind-nailed to begin with, but the installers had occasionally placed face nails to hold boards down, and these were only about 3/8 inch from the bottom edge (see image 1 above). At least the nail shown here had been set more or less flush to the surface, whereas all the face nails the builder had retrofit not only were too close to the bottom edge, but also had been overdriven—and the divots had been filled with spackle (see image 2 above).
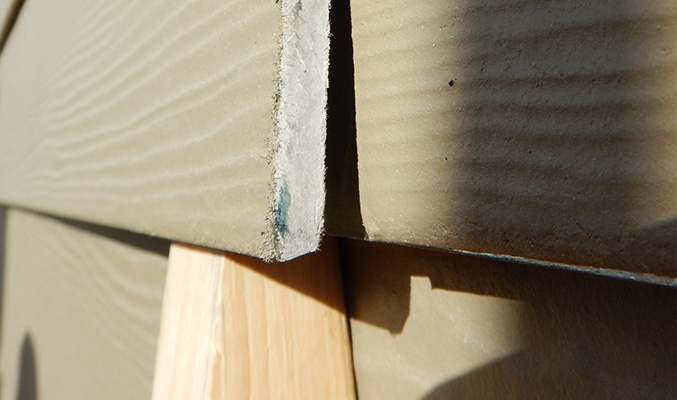
In my initial report, I documented a number of other nailing problems. For starters, the ESR is clear about placement for exposed fasteners at butt joints: Butt joints must be located over studs (or a metal plate must be used for butt joints between studs, but none were in evidence on this job), and the nails placed 3/4 inch up from the bottom edge and 3/8 inch from the ends.
On this job, however, the butt joints were not located over the studs (see image 3 above). The house was framed on 16-inch centers, while many of the butt joints were offset by 24 inches.
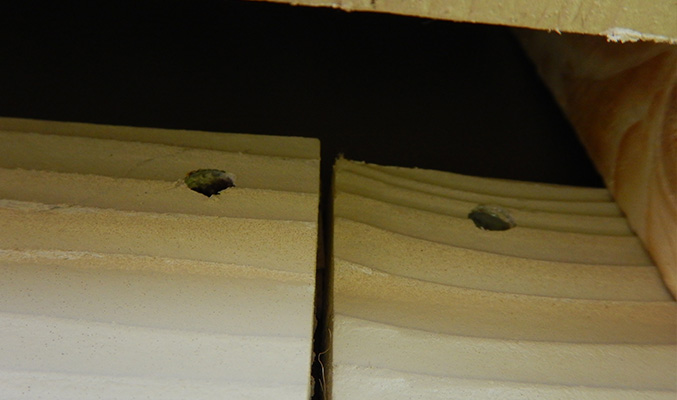
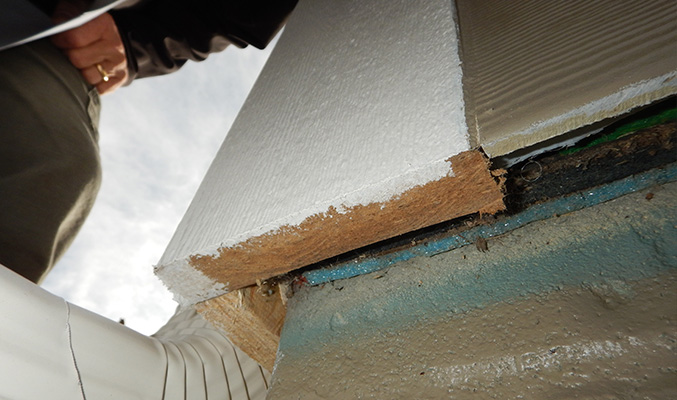
At the butt joints, the builder had initially made an attempt to hold the ends down with a single nail strategically placed to hold both ends (see image 4 above)—an incorrect detail that I see all the time. I have also seen installers try to pin the ends down. Neither solution will provide enough holding power to secure the siding.
For blind nailing, the ESR specifies that fasteners must be placed a minimum of 1 inch down from the top edge of the board, and a minimum of 3/8 inch from the ends. My inspection showed that a majority of the nails were much closer to the top edge (see image 5 above) and many were overdriven (see image 6 above).
The reason for requiring a minimum distance from board edges and ends is clear: When a fastener is placed too close to an edge, the material tends to break around the fastener (see images 7 & 8 above) when boards expand and contract with changes in temperature, or when wind forces push and pull on the material. The vibration caused by loose boards fluttering in the wind no doubt accelerated this failure and is why so many of the fasteners on this job had completely failed.
Like a lot of the homes in this part of the country, the house had been sheathed with a fiber-board sheathing, which has no nail holding strength. With this material, it is especially important to drive the siding nails into the studs. But that clearly didn’t happen. An analysis of the fastener spacing (see image 9 above) showed that the nailing was fairly random—likely a symptom of a zealous installer firing rapidly across each board with a pneumatic nailer.
WATER MANAGEMENT DETAILS
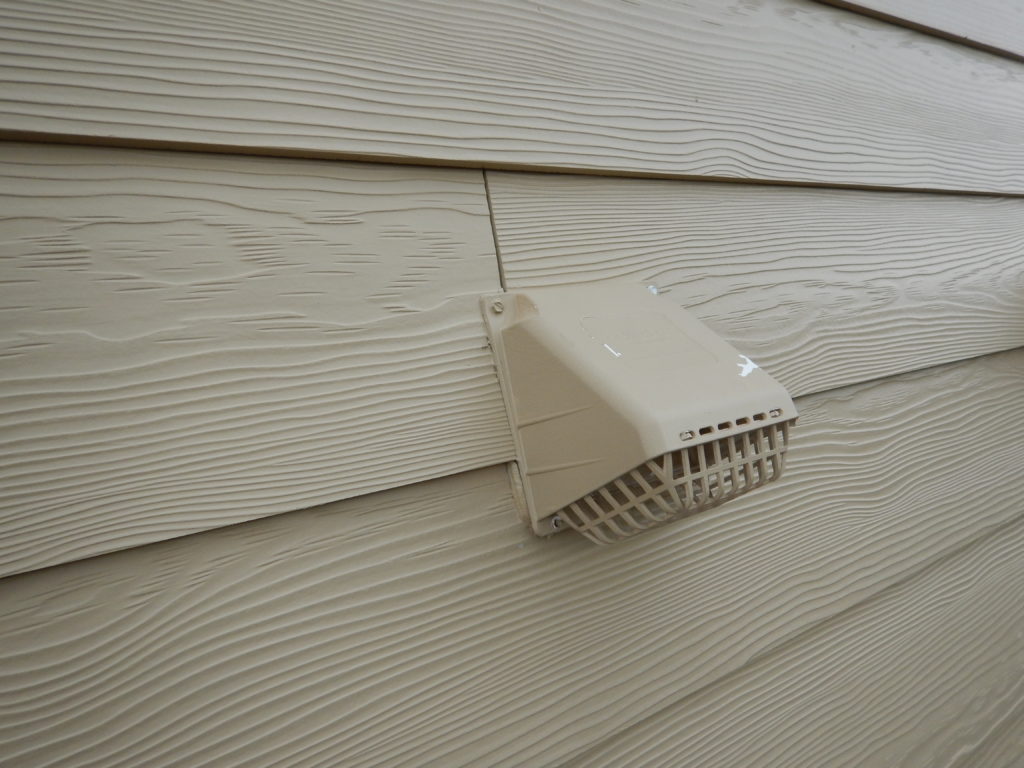
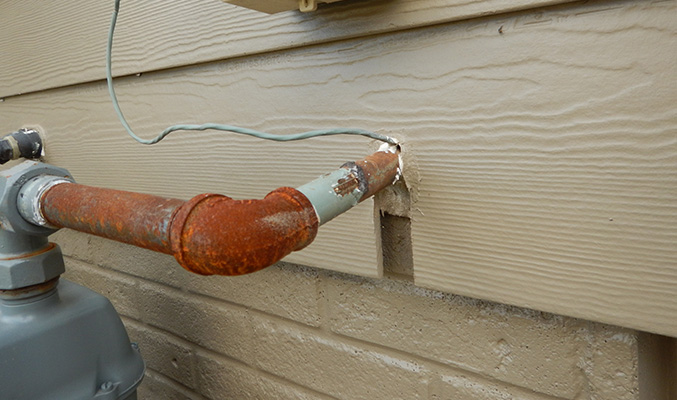
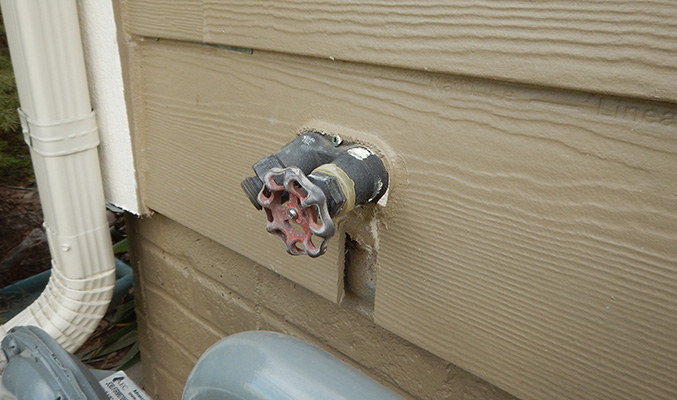

There were a number of egregious water-detailing problems too. One of the worst was a siding break made directly above a dryer vent (see image 1 above). Water leaking through this joint hit the vent pipe and followed it to the interior, where, not surprisingly, we found water marks. At all the other penetrations—at the gas line near the meter (see image 2 above) and the hose bib (see image 3 above) —the siding had simply been slotted around the pipe or vent, which not only looks bad, but also leaves the wall open to serious water and air leaks.
The correct way to detail an existing pipe or vent penetration is to use a split mounting block. When one of these is used, a hole saw is centered along the split, and half the block is slid over, and the other half under, the pipe or vent. The split, which is beveled so it drains downward, is tightly sealed with caulk.
Butt joints. Fiber cement won’t rot, but it is not completely impervious to water. It can absorb water at ends and edges, and swell. This not only looks bad initially, but the movement of swelling and drying and freezing and thawing will gradually cause the material to deteriorate at vulnerable edges.
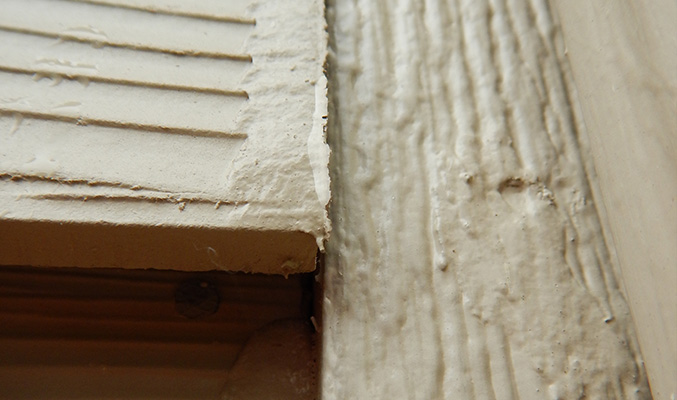
It’s critical that board ends butting against window and door openings, or against corner boards, be cut at least 1/8 inch short to accommodate expansion. On this job, the boards were frequently butted hard against the trim (see image 4 above). This left no room for the material to expand, and it also created an inferior caulk fillet that failed quickly and allowed water to seep into the joint when the siding boards contracted.
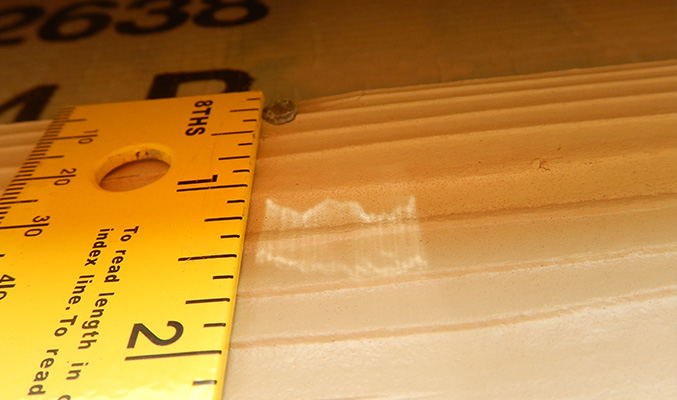
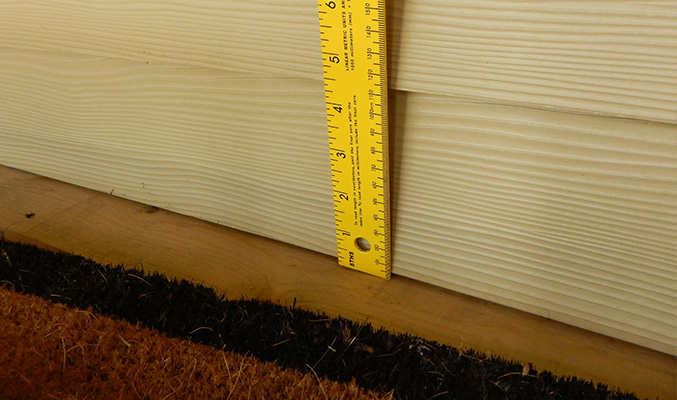
Cut edges. The installers on this job also failed to prime the cut ends of siding and trim boards, as specified in the manufacturer’s instructions to protect the material from water (see image 5 above). This is particularly important for exposed edges at the base of the wall (see image 6 above). Water running down the face of the wall can turn under that lower edge, and splash-back will further wet this area.
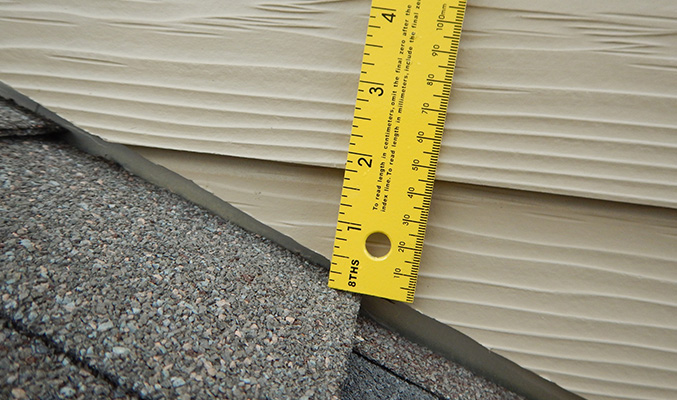
Clearances. All fiber-cement manufacturers specify minimum clearances where siding hits a horizontal surface. This can include horizontal trim, such as above the head trim on an opening, above the mounting block for exterior penetrations, or where the siding lands on the top edge of water table. At least 1/4 inch is required, and this gap should remain uncaulked. However, the installers on this job left only about 1/8 inch (see image 7 above).
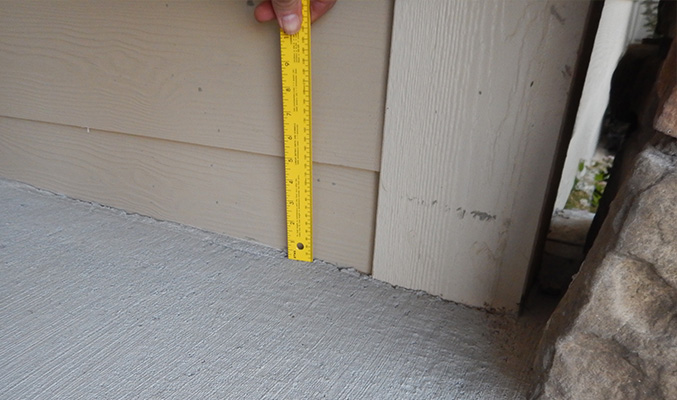
The clearance between the siding and a deck, porch, or hardscape surface, or along the rake of a roof, is much greater. For MaxiPlank, this clearance is supposed to be at least 1 inch to 2 inches. (But Hardie, for example, requires at least 2 inches in our climate zone. Don’t assume all fiber-cement details are the same.) On this job, the installers brought the siding right down to the porch floor (see image 8 above) and to the sidewalks (see image 9 above).
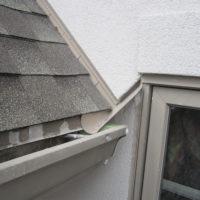
Sidewalls. The installers also brought the siding down onto the roof surface where sidewalls intersected a roof (see image 10 above). And they left out any kind of kick-out flashing where the bottom edge intersected with the wall (see image 11 above). When this was called out on my initial report, they cut back the siding and smeared a lot of caulk into the corner in lieu of a kick-out flashing (see image 12 above).
A true kick-out flashing, as shown in this photo of one of my siding jobs, is a large flashing that gathers water and directs it into the gutter. Note, too, how I detail the rake: I run a trim board along the rake, keeping this the required distance above the roof surface, and bring my siding board down to the trim, maintaining a 1/4-inch gap that gets caulked. Details like this let me stay profitable and allow me to sleep at night.

Why I am NOT a Home Inspector
Call Before It's an Emergency
© Copyright 2026, The Building Consultant/Mark Parlee
Des Moines Web Design  by Flying Hippo