


I was recently called to consult on an Iowa home that had extensive roof leaks into the finished space. According to the homeowner, the leaks began showing up as water stains on the ceiling in several rooms throughout the house shortly after the roof had been replaced.
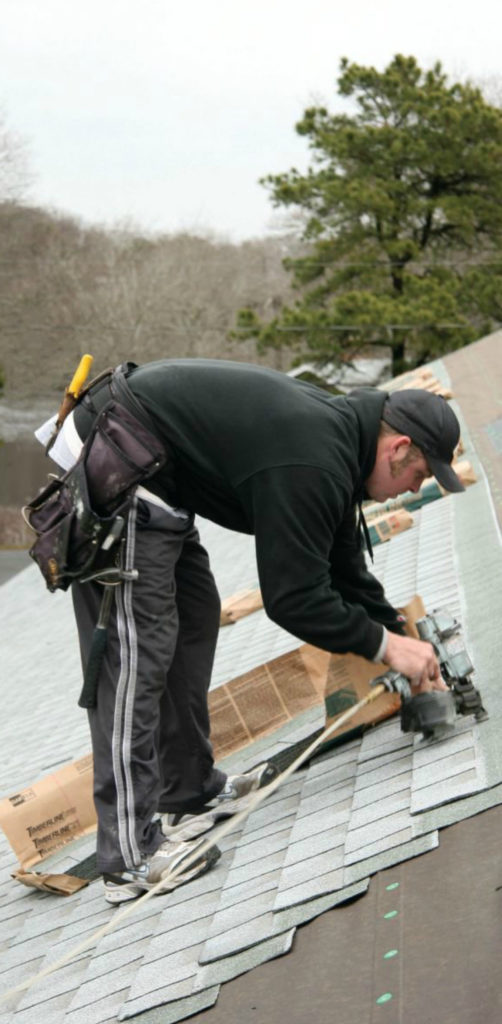
The photos on the following pages show the condition of the roof when I saw it three years after it had been installed, and it was immediately evident to me that the roofer had done an exceptionally poor job. The shingles themselves were a decent-quality laminated product, as is usually the case with the roofs I see; however, it’s not the shingles but the detailing — namely of the flashing — that determines the quality of an asphalt shingle roof.
All of the leaks stemmed from poor attention to detail when the shingles were being installed and flashed. These problems included the following:
- There had been a complete failure to install a new step flashing or even to integrate the new shingles with the existing step flashing.
- Shingles had been laid without an adequate offset between courses.
- Shingles had been nailed haphazardly. In many cases, no nails were evident at all, and in others, nails were overdriven or crooked.
- Shingles had not been accurately cut to fit around the roof vents.
- No drip-edge had been installed along any of the roof edges.
- No plumbing vent boots had been installed. Instead, these penetrations had been “blackjacked” — asphalt roof cement had simply been smeared around the bases of the vent pipes.
With so many problems, the only solution I could recommend was a complete replacement of the entire roof. What a terrible waste of a three-year-old roof.
While this particular job provided a good opportunity to look at a number of problems all at once, not all asphalt shingle roofs are done this poorly. However, in my experience, many reroofs suffer from at least one or two of these mistakes – and it only takes one to cause a leak.
STEP FLASHING AND KICKOUTS
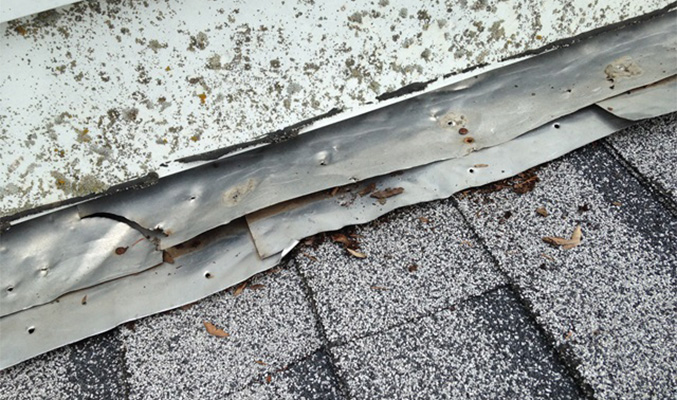
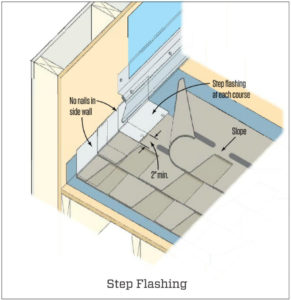
On this job, the roofer completely ignored the existing step flashing and merely tucked the new shingles beneath both the step flashing and the counterflashing (1,2). These existing flashings were in rough shape and should have been replaced. If the roofer had even made an effort to interlace the shingles between the steps, at least there would not have been a direct leakage path between the shingle surface and the old flashing. As it was, the ceiling areas below this intersection suffered the most damage from water leaks.
It was obvious that the roofer did not want to deal with the stucco that came down over the sidewall flashing. had the original counterflashing been addressed more like the counterflashing shown in the “Step Flashing” illustration (above left), destruction of the stucco cladding would not have been necessary to replace the flashings.
Kickouts, which direct water into a gutter at the lower end of the roof-wall intersection, are critical for preventing leaks. I covered them in detail in a previous post, “Getting Kickout Flashings Right”. At the bottom of the roof, large kickouts are essential to deflect the volume of water away from the siding.
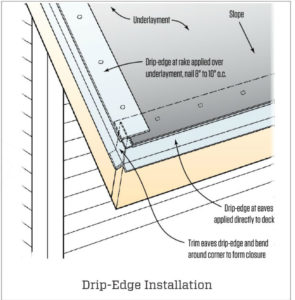
DRIP-EDGE
-
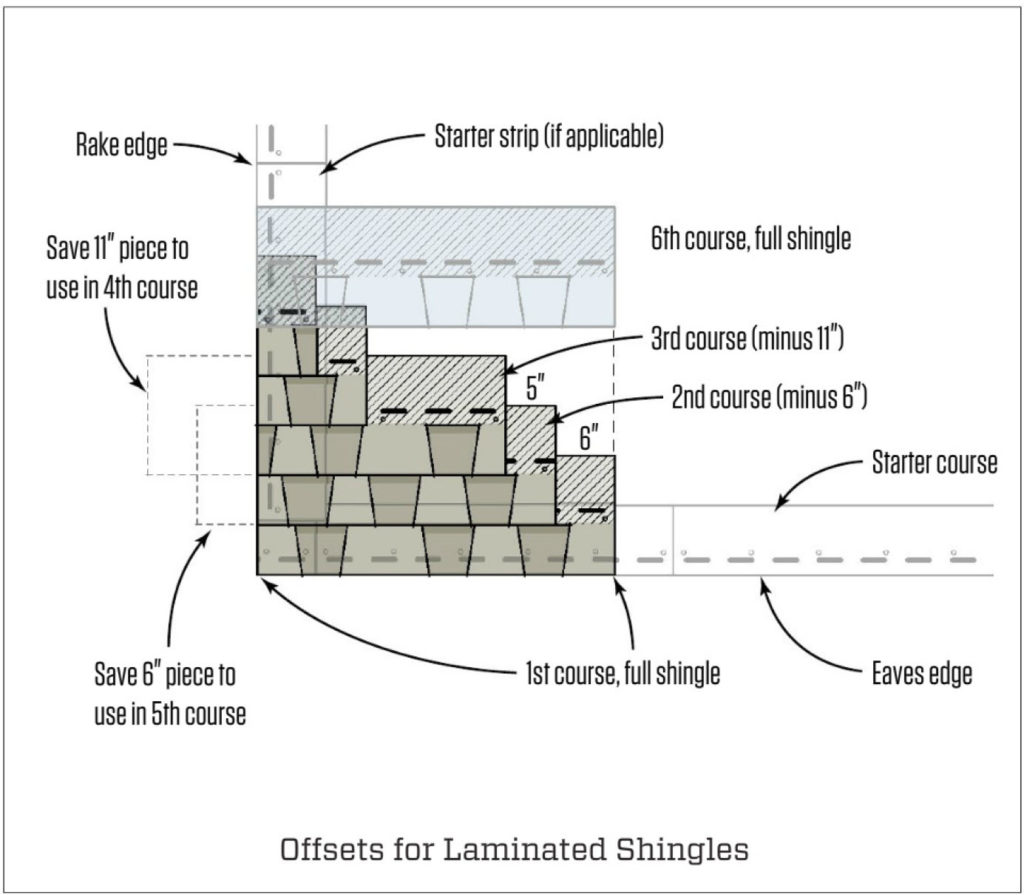
- Since most roof dimensions are not an even multiple of standard shingle sizes, fractional shingles – preferably of equal size- are needed to fill out courses. Provided the fraction isn’t smaller than the minimum offset (as it is on this roof), this is an aesthetic issue and is much less noticeable with laminated shingles, because of the random appearance of the overlaid pieces, than it is with three-tab shingles.
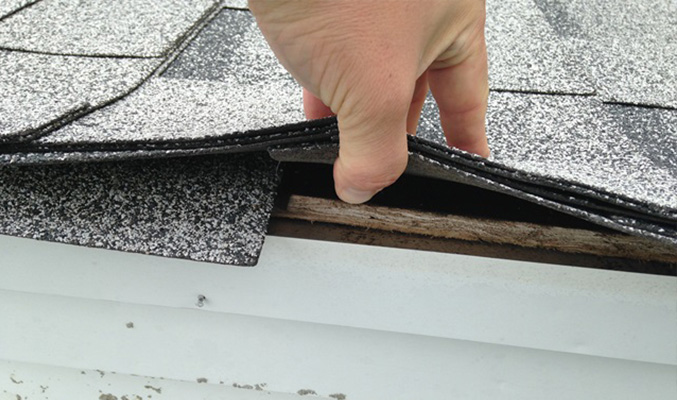
Metal D flashing, or drip-edge, is sometimes installed only along the eaves edge, but it is actually required by the 2012 International Residential Code (IRC) “at eaves and gables of shingle roofs.” At “gables,” of course, means along rake edges. The purpose here is to help prevent wind-blown rain and capillary action from directing rainwater and snow melt underneath the underlayment and shingles.
This particular home had a metal fascia. The metal D flashing should overlap the top edge of this fascia; this is important because it helps keep water from getting down behind the fascia and rotting out the subfascia. At the eaves edge, a drip-edge also helps direct runoff into gutters (although additional help may be required).
The roofer on this particular job did not install any drip-edge flashing, and you can see how the edge of the sheathing has weathered from exposure to water.
Drip-edge should be installed directly over the edge of the roof sheathing along the eaves. Along the rake edges, however, the drip-edge should be installed after the underlayment is installed (see Drip-Edge Installation, facing page, right). This last detail is commonly overlooked because roofers often want to install all the drip-edge at once. Installing the drip-edge over the underlayment at gables – an area especially vulnerable to wind-blown rain – is the best way to ensure that water does not have a clear path beneath the underlayment.
When a single length of drip-edge isn’t long enough, overlap the end joints at least 2 inches (a specification required in the 2012 IRC). And be sure to install the lengths high along eth rake so they overlay lower pieces to promote drainage.
SHINGLE LAYOUT
-
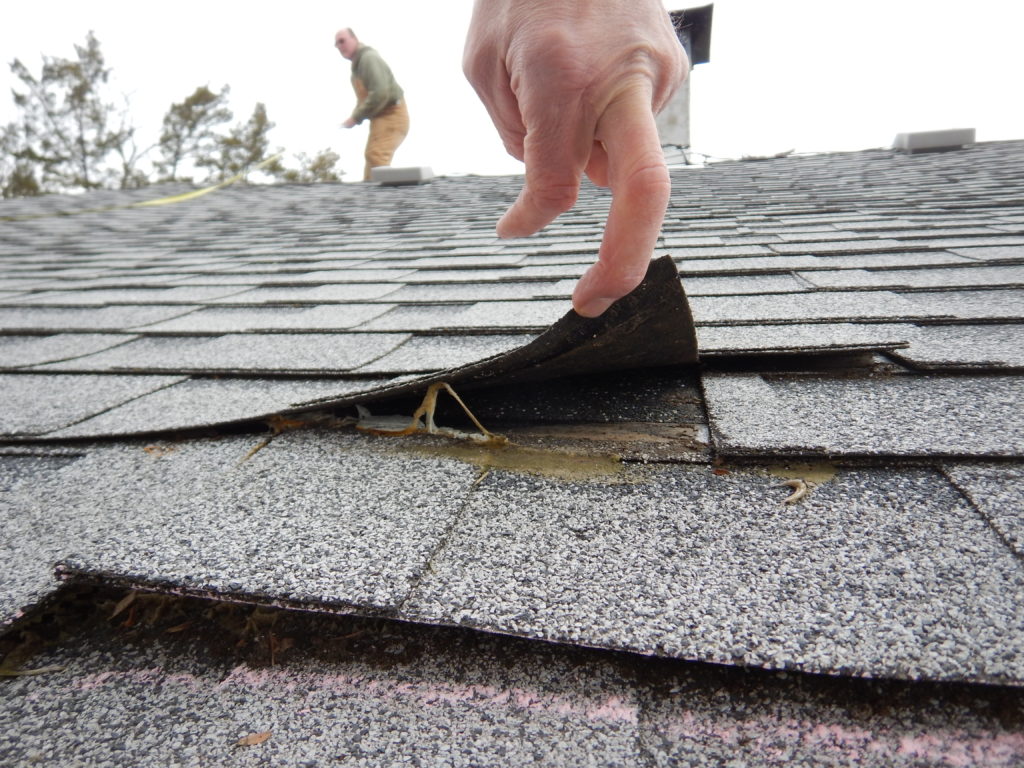
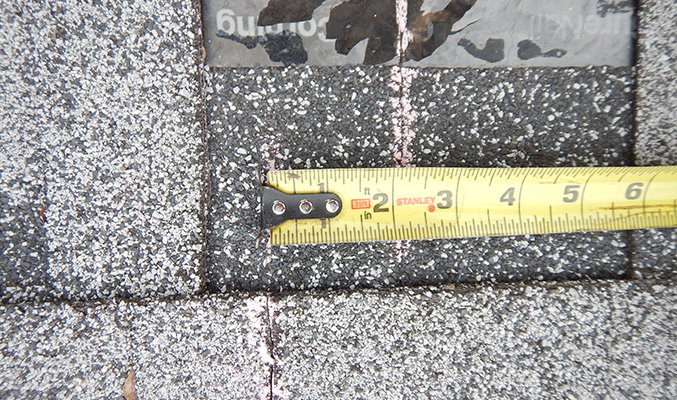
- Shingle nailing. When the author inspected the project, no nails were evident at the ends of many of the shingles.
-
- The standard nailing for asphalt shingles is a four-nail pattern, with nails placed in 1 inch from each end of each shingle and then two nails placed 12 inches in from the end nails, as shown in the top of the “Shingle Nailing” illustration.
-
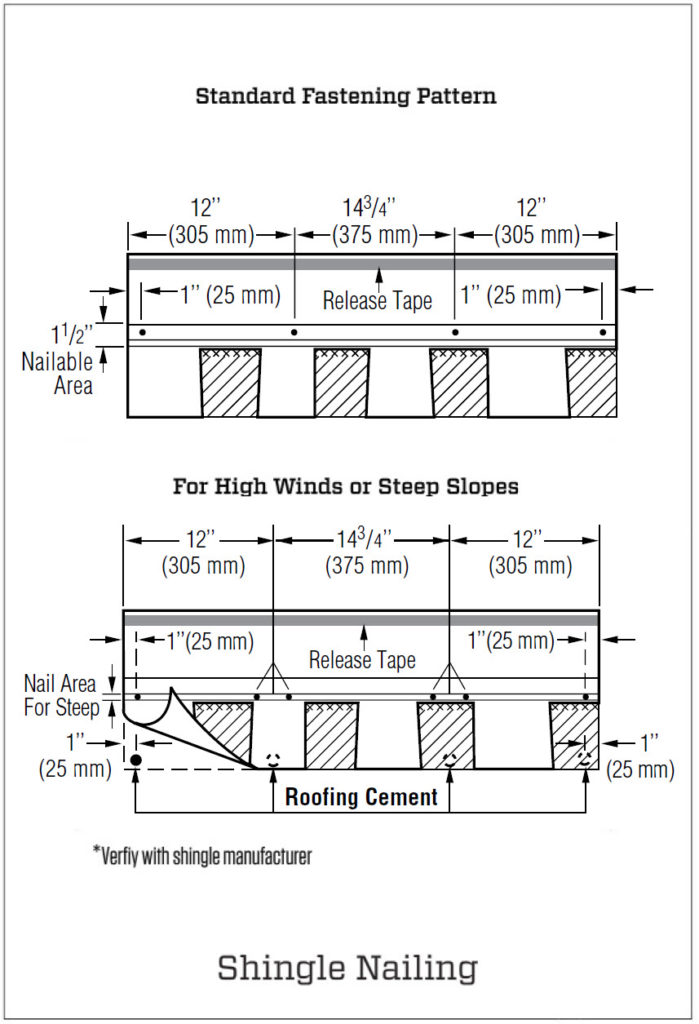
- On laminated shingles, this nail spacing is not as immediately apparent as it is on three-tab shingles where the nails are placed above the cutouts. In high-wind locations and steep-slope applications, a six-nail patter should be used, as shown in the bottom of the same illustration.
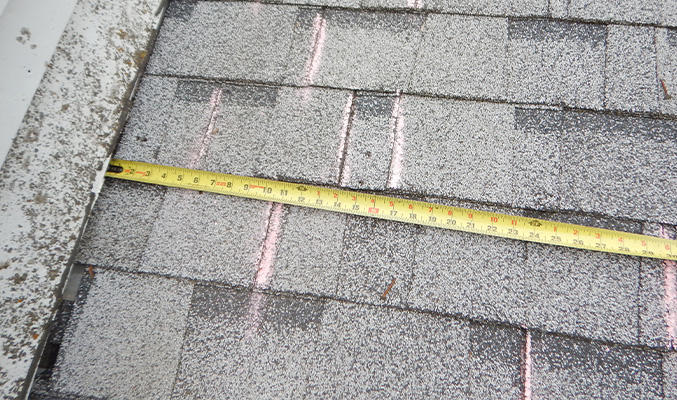
Shingle manufacturers specify a minimum overlap, usually in the range of 4 inches to 5 inches. On this roof, the minimum overlap specified by the manufacturer is 4 inches, and the recommended overlap is 6 1/2 inches.
But the way the shingles were installed, the offset was often less than 4 inches – and even as small as 2 inches – which may have accounted for some of the leaks that occurred in the interior near the center of the house. (Bear in mind that it’s often difficult to track the exact location of a roof leak, as water often runs down framing members and may end up spoiling interior finishes far from the actual leak site.)
Sticking to the minimum offset helps to keep end joints between shingles at least 2 inches away from the nails at the end of the shingles in the course below.
SHINGLE NAILING
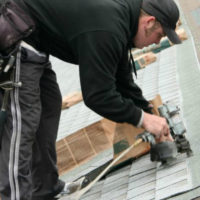
Most asphalt shingle roofs can be fastened with a four-nail pattern. The key is to keep to a consistent pattern – 1 inch from the edges and uniformly spaced across the shingle length.
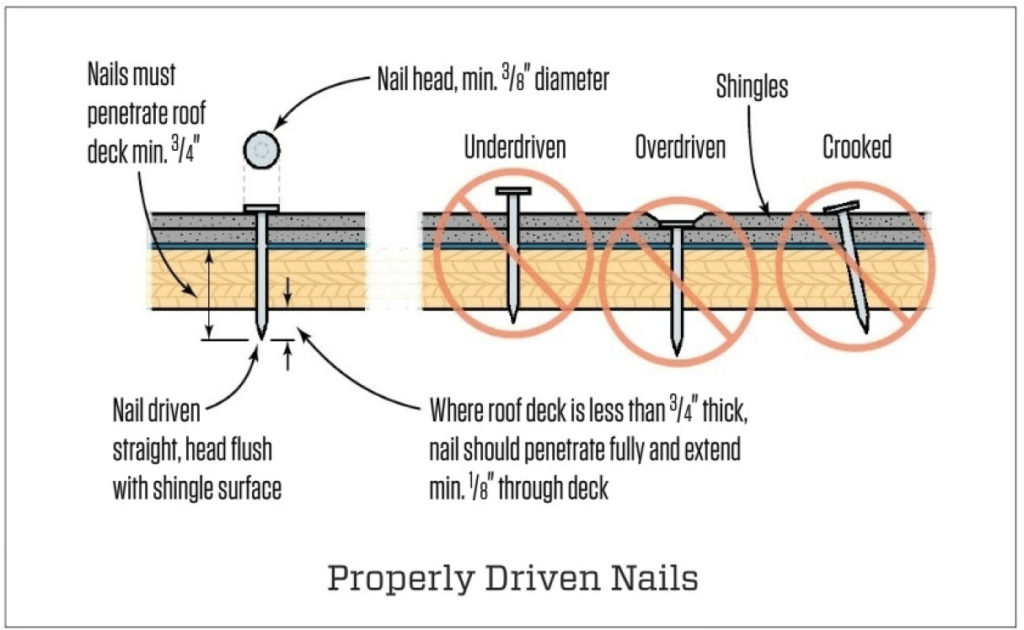
On this roof, the nailing was sporadic, and in many places, there were no nails visible at all. This is often the result of installers trying to blow through an installation as fast as possible, machine-gunning their way across the roof with pneumatic roofing nailers. When this happens, the likelihood for overdriving nails and driving nails crooked increases (see Properly Driven Nails, top right).
Of course, overdriven and crooked nails are still possible in the normal course of production. When they do occur, the fastest repair is to drive the nail so it is fully below the shingle surface, seal the hole with roof cement, and then drive .a new nail next to it. If it’s not possible to sink the nail head, pull it.
In high-wind regions and on steep roofs, a six-nail pattern is required to reduce the risk of blow-offs (see Shingle Nailing, facing page, left).
VALLEYS

Because of the sheer volume of water running off the angled roofs draining into a valley, the detailing at roof intersections is some of the most important.
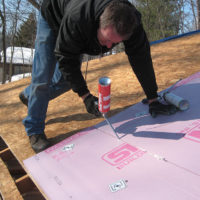
All valleys, regardless of type, should be lined with a minimum 36-inch-wide peel-and-stick membrane. This membrane should be run with the width of the material centered along the length of the valley. The peel-and-stick needs to be installed directly to the roof sheathing before a roofing underlayment is installed.
The majority of roofs in my area have closed-cut valleys, which only require a cut along one side of the valley and can be installed relatively quickly. The right way to do these is shown in the illustration above.
The two most common errors with closed-cut valleys are failing to take the time to seal down the cut edge with roof cement, and failing to clip the top corner of the shingle at the top of the cut (see detail . bubble in Closed-Cut Valley, above).
Clipping the leading corners on a closed-cut valley is almost never done around here, even though it is very important. As water runs down the valley, it tends to get pulled in by the acute angles at the top edge of each course of shingles along the cut edge of the valley. These points can divert water down the concealed top edge of each shingle course. When the corner is clipped, the water will still slosh onto the corner, but now the edge is pointed into the valley and water is much less likely to run along the top edges of the shingles.
Another type of valley is an open valley, which relies on a formed piece of 26-gauge (minimum) metal at least 24 inches wide. It is by far the most durable and leak-resistant kind of valley, but we almost never see one on the reroofs in this area because of the added cost.
ROOF PENETRATIONS
-
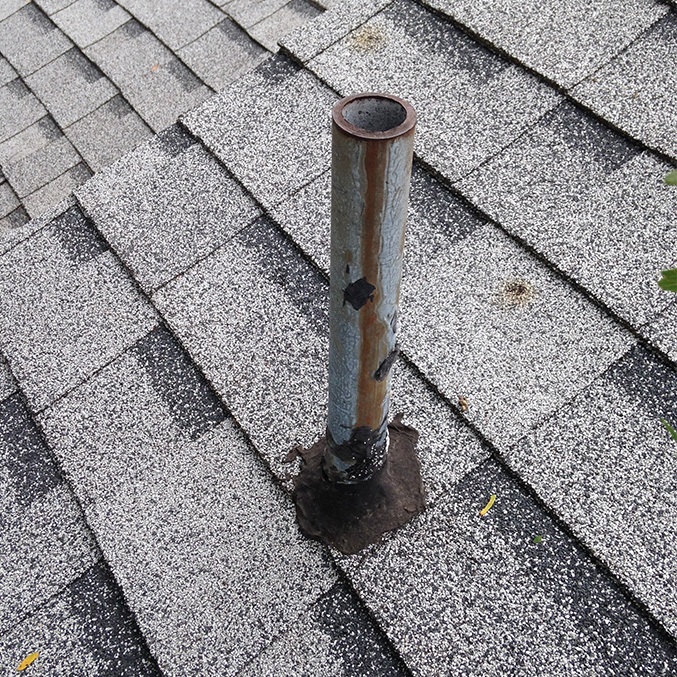
- “Black jacked” plumbing vents are all too common, but this is not a good way to flash a roof penetration.
-
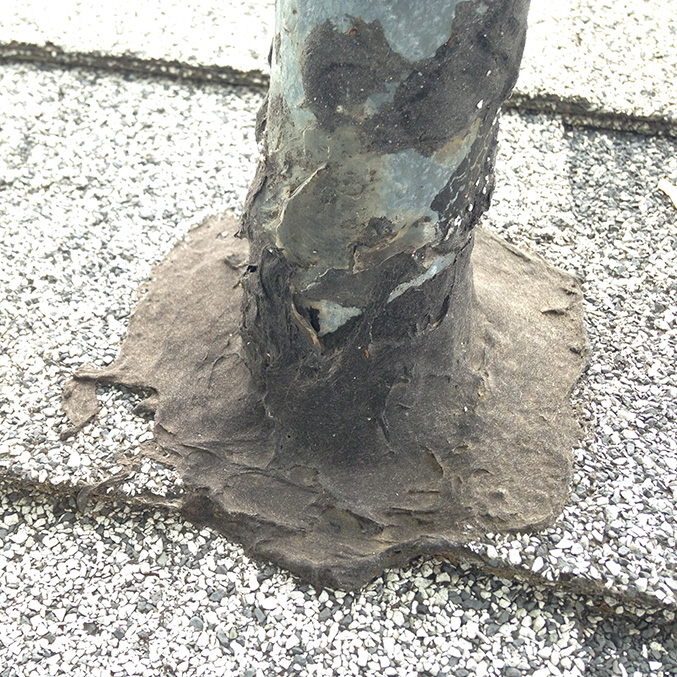
- Roofing cement dries out and becomes brittle and will crack. Also, gaps and thin spots open up as the cement dries out and these essentially create funnels running straight into the roof assembly.
-
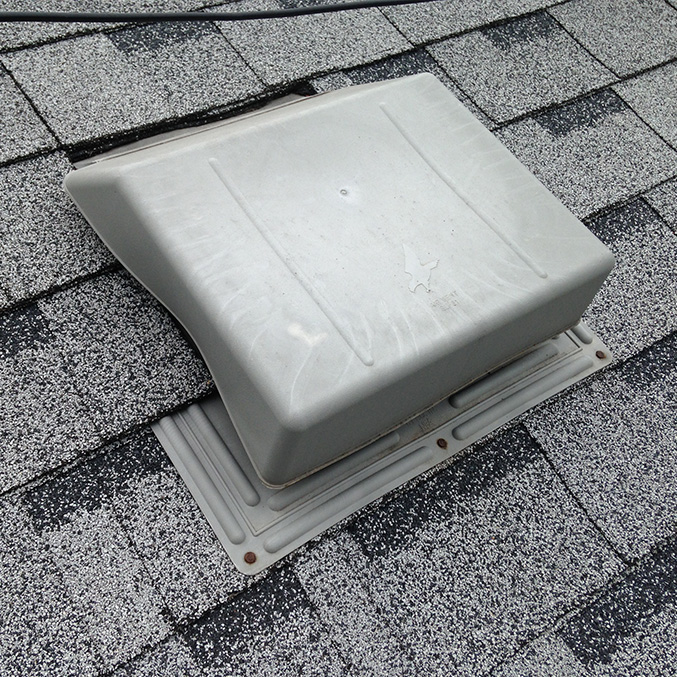
- Also shown here is a very poor installation of a self-flashing roof fent. The shingles were not cut carefully around the vent but were instead jammed up against the vent, distorting the hood.
Any roof penetrations, including plumbing vents, roof vents, chimneys, and skylights, present direct opportunities for leaks. Plumbing vents and pop-in roof vents are the most common problem areas, and unfortunately, on a lot of reroofs, very little effort is paid to these other than cutting the shingles around them – usually quickly, while running shingle courses.
Part of the problem may be that replacement roofs are often sold more as a commodity than as a craft. Consumers shop on the basis of price and many roofers sell jobs on low margins. If there’s a short-cut to be taken, they will take it. After all, how many homeowners are likely to go up on the roof and inspect it? So while a good-quality, two-piece plumbing boot costs only $20 to $0, there are often enough vent stacks on the roof that the cost difference between installing boots and simply smearing the base of the vent with roofing cement can be the difference between making a profit, however slim, or losing money.
That, of course, does not justify not installing a proper plumbing boot, but it does speak to the idea that selling a quality roofing job begins with educating the client about long-term roofing performance issues. This will be an uphill battle, particularly as DIY home-improvement media continues to push oversimplified ideas of what it takes to remodel a home.
Continue Reading:

Why I am NOT a Home Inspector
Call Before It's an Emergency
© Copyright 2026, The Building Consultant/Mark Parlee
Des Moines Web Design  by Flying Hippo