- Categories:
- Moisture Intrusion
- Siding Damage
A common exterior detail on homes throughout North America mixes a manufactured stone veneer, or what the industry calls adhered concrete masonry veneer (ACMV), on the lower part of the walls with some other type of cladding, such as stucco or vinyl, on the upper part. The stone creates an exterior wainscoting, if you will, that looks nice. But unless the details are executed well, it only looks nice for a short while.
Builders in my area have been using manufactured stone for more than two decades, but judging from the number of failures, they still get some of the critical water management details wrong. While there are still problems with flashings and drainage planes on the upper cladding, the basic materials to create a drainage plane are in place. But builders are treating the exterior as if the siding stops at the stone, as if the lower sections of wall are covered by an impervious material that will completely protect the wood framing to which it is adhered. ACMV is very porous and will absorb water. Think of it as fat stucco with chunks of concrete in it. That’s really what it is, and it should be detailed accordingly.
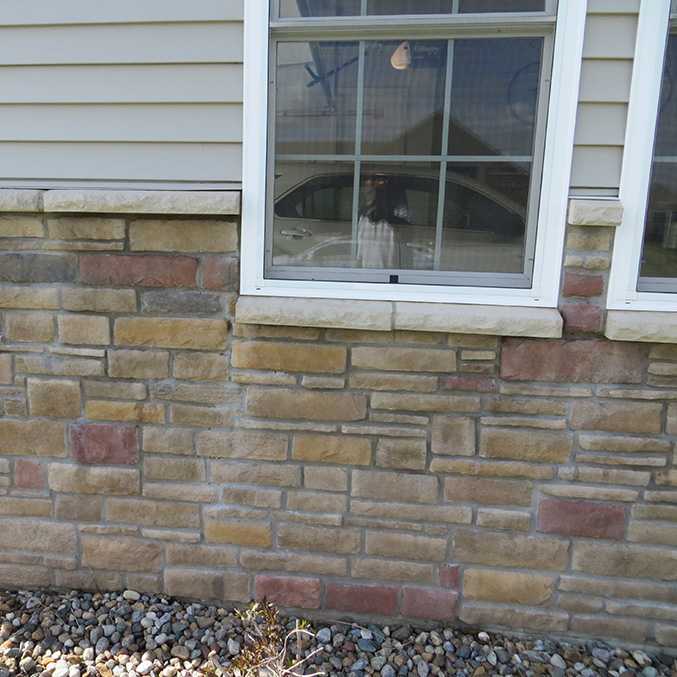
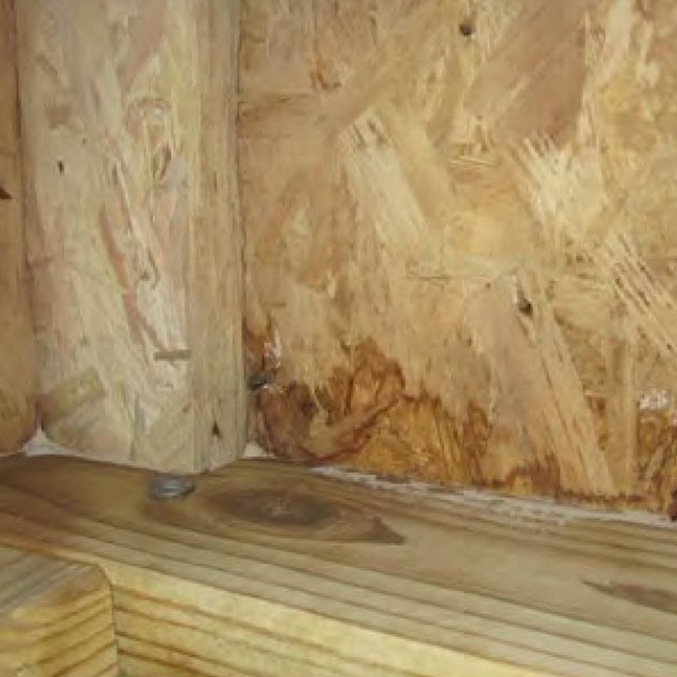
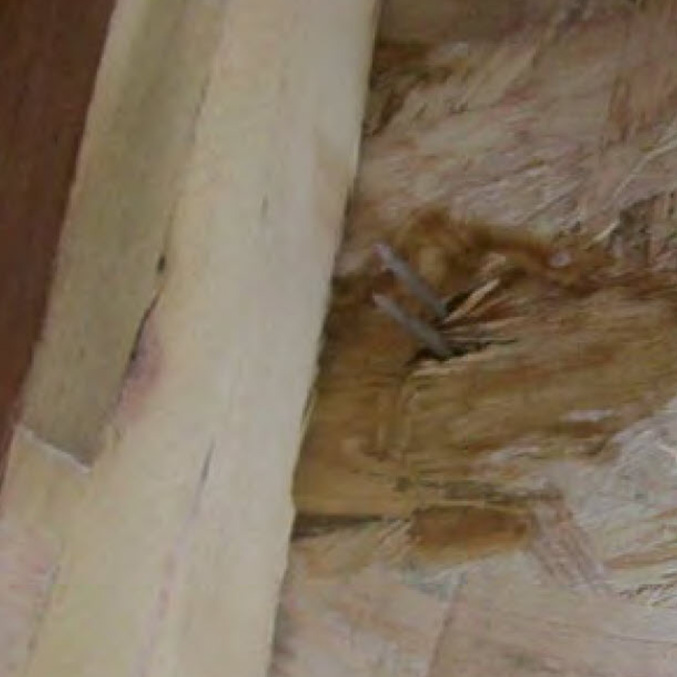
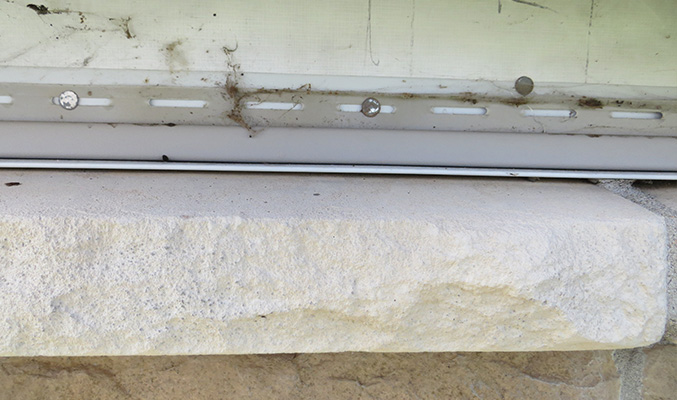
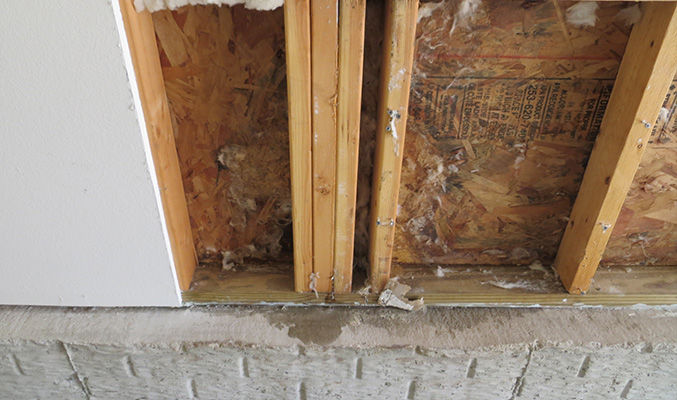
I was recently called in to look at a house sided with vinyl siding and ACMV. Water staining on the interior drywall and leakage below a window in the garage prompted the call, but inspection also revealed efflorescence on the stone (see image 1 above), damage to the OSB near the foundation sills in other parts of the house (see image 2 above), and corrosion, even rot, around fasteners through the sheathing (see image 3 above).
The efflorescence reveals where water is concentrating as it drains from the upper walls and windows. The ACMV is absorbing this water, and as it evaporates from the stone, it is bringing calcium hydroxide (from the lime in Portland cement) to the surface, where it reacts with the carbon dioxide in air to form a white powder. This is normal for any concrete product. What makes it noticeable is that the wall is becoming disproportionately wet in some areas where the efflorescence is happening more.
After hosing down the upper wall to confirm the leakage pathway (see image 1 above), we tore off the drywall below the window to reveal a wet wall cavity with mold-infested OSB (see image 2 above).
The problem was a poor flashing detail at the edge of the window and the lack of an effective drainage plane behind the ACMV. The builder had applied a single layer of housewrap to the walls, before slathering them up with mortar and applying the ACMV. Any water draining from the upper walls hit an ACMV dam, and traveled in three ways:
- Some of the water flowed down the crack between the housewrap and the ACMV. There was no flashing here, just the vinyl starter strip (see image 3 above).
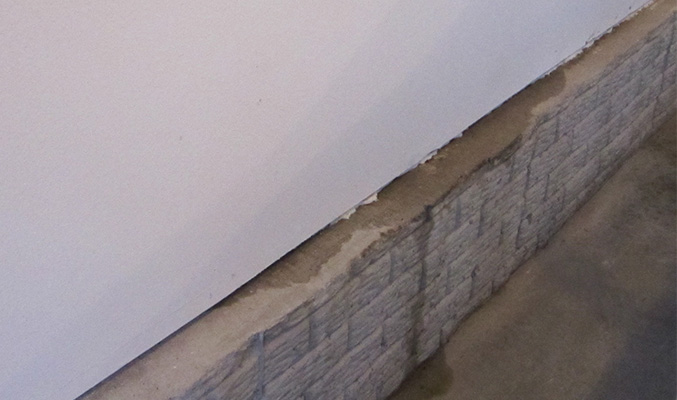
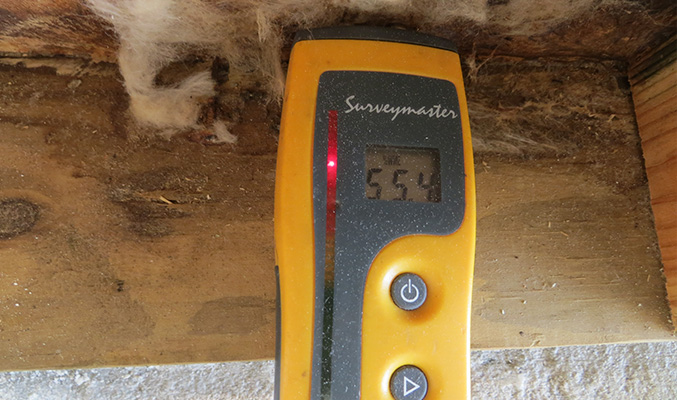
- Some water flowed down the exterior, soaked through the ACMV, passed through the housewrap by capillary action, and soaked the OSB sheathing, where we measured 55% moisture content (see image 4 above).
- And some of the water flowed around the window flange and down the wall studs inside the garage. The window had a built-in J-channel to receive vinyl siding. This worked well for the upper part of the window that butted against vinyl, but on the lower part of the window that abuts the ACMV, there was a big open channel that allowed water to drain right into the wall.
What’s required here is an insert (available from window manufacturers that make this type of vinyl window) to fill the J-channel, and then backer rod and sealant installed between the window insert and the ACMV. Getting a good seal using backer rod requires a skilled installer. A more foolproof way to create a durable seal between the ACMV and the window flange is to install a vinyl casing bead, such as E-Z Bead (amico-lath.com/e-z-bead.htm), to create the proper sealant channel.
Had the wall details allowed for it, the water should have drained all the way down the drainage plane to the bottom of the wall, where it must be allowed to escape and drain away from the build- ing. To make this happen, the wall needs a continuous drainage plane behind the vinyl that is allowed to drain out of the wall via a through-wall flashing above the ACMV. Vinyl is a loose and forgiving cladding, and you can get away with one layer of housewrap, as long as it is lapped over the top of the through-wall flashing.
Behind the ACMV, you need much more. The ACMV should be detailed like a stucco wall. I like to use a rainscreen mat, such as the Keene Driwall system, over the housewrap. (If a rainscreen mat is not used, at the very least you need a layer of black paper over the housewrap, or two layers of black paper, as is required by code for an exterior lath and plaster assembly.) The housewrap and rainscreen mat should lap over the foundation sill and terminate at the bottom of the wall at a weep screed positioned at least 4 inches above grade.
I get a lot of push-back from builders who complain that a two-layer WRB, or a WRB with a rainscreen mat, is expensive. The details shown in the illustrations here will end up costing $2 to $3 per square foot, depending on your location. That’s a real investment, I admit. But compare that to the cost of remediation: This job will cost at least $25 per square foot in labor and materials to fix, and I have had remediation jobs for failed ACMV that have gone as high as $58 per square foot. This says nothing about the legal fees that might be involved, and the long-term damage to your reputation as a builder. I’ll take the couple of dollars a square foot over the remediation costs any day.


