Report #001

  • Home Value: 577,000
  • Damage Amount: 48,000
  • Damage Percent: 8.3%
  • Severity:
  • Damage Frequency:
 

Section 1: Overview

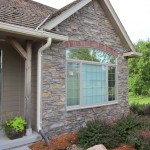
The residence listed above was constructed in 2005. The home’s exterior cladding consists of asphalt shingles on the roof and a combination of fiber cement board siding by James Hardie and manufactured stone veneer by Centurion stone. The main focus of this report is the stone façade where moisture intrusion has been discovered.

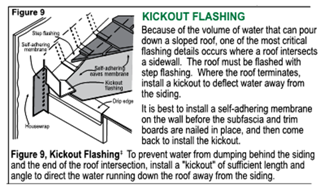
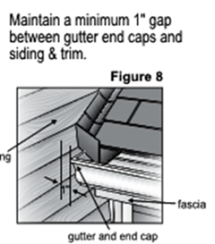
There are some notable issues with the way the claddings were installed compared to the details of installation these manufacturers specify. This is noted on the siding with regard to clearances and kick-outs where the roofline meets a sided wall and a gutter terminates into a sided wall plane as well as some of the stone installation details. At the time of my visit when we were talking to the representative from Centurion He made some comments about the flashing around the windows as being the responsibility of others. While this is true in the installation of the window and its associated SAF (self adhering flashing) ((the window tape)) it should be noted the masonry contractor is responsible to not cover up a poorly detailed assembly and communicate these deficiencies to the general contractor.

The older documents from Centurion stone leave a lot to be desired and have been characteristically loose when it comes to specifications regarding clearances and detailing at windows. The current documents by Centurion are better but still are lax when compared to some of the other manufacturer’s’ instructions for installation. I refer to a document titled Installation Guidelines for Adhered Concrete Masonry Veneer by the Masonry Veneer Manufacturers Association. The various stone veneer manufacturers are becoming more aware and educated as time passes regarding best practices of installation of their products. I see the value of an additional layer of protection being added that functions as a drain plane. This will allow any incidental moisture to drain out of the assembly instead of being trapped as is the current situation. Attached to this document is the MVMA installation guide. I advise the installation of the new stone to follow and adhere to these guidelines with the addition of the drain plane. There are a couple of products I recommend for the drain plane: MTI Sure Cavity or DELTA®-DRY. The Technical Information Flashing for Stone Veneer Installation Sheet at the end of this report is from Centurions’ website and was not followed in this installation of the stone veneer. It is dated 5.22.05.

The balance of the stone on the home was not checked in detail as there are no complaints regarding  moisture penetration. If in the course of correction a decision is made to remove and replace all of the stone the detailing on the fire place chase and its cap need to be reviewed.

I advise an environmental engineer be consulted to do a review of the apparent microbial action so it can be properly indentified and remediated if necessary.


Section 2: Windows


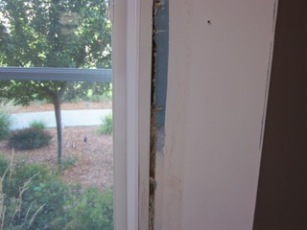
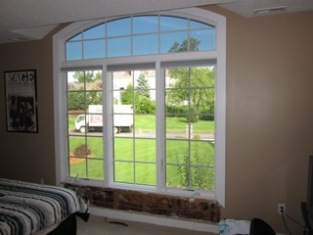
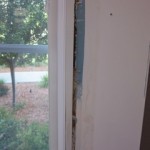
The windows on the front of the home are leaking at the perimeters due to incorrect flashing details at the windows by both the window installation and the stone detailing.

Removal of the stone reveals only a single layer of WRB (weather resistant barrier). Most stone manufacturers are recommending a double layer of grade D building paper. Moisture appears to be migrating in at the window perimeters and overwhelming the WRB and penetrating the OSB behind it. The potential for microbial action is very high.

MBR window: the moisture is elevated in the exterior sheathing at this window.

This extends into the floor assembly below.


This is the floor system below the MBR window. The moisture has intruded to the plate line at the top of the foundation.


Section 3: Testing for Moisture


This reading is taken at the window perimeter at the top of the drywall cut out on the left side. Moisture content is 100%.


The reading is 19% MC at the top of the blinds. This is a little higher than equalized MC for the wood  but in the safe range.

Normalized range was 10% to 12% in this home on the day of my visit.


This is at the bottom edge of the window frame opening.  Moisture content of 28%  is too high, indicating moisture intrusion.


Section 4: Leaks

Dining Room window: corrosion on these fasteners indicate an elevated moisture level.

Staining on the OSB sheeting indicates there is a leak at the perimeter of this window.

This leak does not appear to be as progressed as the one at the MBR window, but over time will continue to increase as the materials break down. There was some slight microbial action in the floor system under this window.

After this leak is corrected the framing should be treated to eliminate any further microbial action.


Moisture stains on the drywall where the trim was removed.


Section 5: Upstairs Bedroom


Front upstairs bedroom


Moisture tests high at window in upstairs bedroom.


Section 6: Roof Flashing

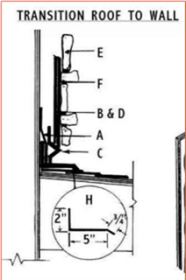
The stone facade is too close to the roof plane and lacks a kick-out flashing detail. The assembly is grouted to the shingles. A two inch clearance and a kick-out flashing is recommended by the best practices for the stone.


Section 7: Stone and Siding

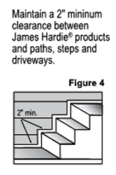
Improper clearances from concrete: 2” clearance recommended for stone and siding.

The concrete was poured over some of the siding which will lead to degradation of these materials over time.


Section 8: Kick-outs and Clearance Issues

A kick-out detail is recommended by the siding manufacturer; some moisture is migrating behind the siding at this point.


Kick-outs and clearance issues:

  • This siding is to be 2” from the roof plane .
  • A kick-out should be installed where the gutter terminates at the wall.
  • Gutter is to be one inch away from the siding.